By Oracle ACE Director Wilfred van der Deijl and Oracle ACE Richard Orlichs
Continued from Part 3
7. Distribute the Extension
Now that you know how to create rules in your extension project, it's time to share your extension project with the rest of the world. However, you don't want to spam everyone every time there is an update. Luckily, we can automate by creating an Update Center.
7.1 Creating a bundle.xml
The first thing we're going to do is to create a bundle.xml with the information about this extension. We're going to create an XML file in the Extension project:
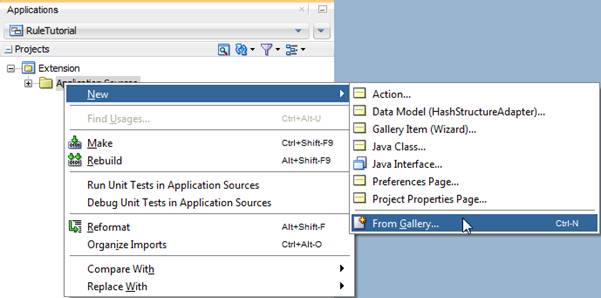
Select XML and then XML Document:

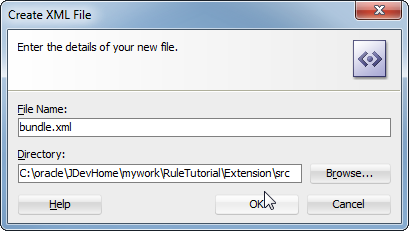
Call it bundle.xml and click OK:
This bundle contains certain information about your project. It starts with properties like name, version, author, and description. You can add information about yourself and the extension in this section. As a starting point, you can use this source code:
<update-bundle version="1.0"
xmlns="http://xmlns.oracle.com/jdeveloper/updatebundle"
xmlns:u="http://xmlns.oracle.com/jdeveloper/update">
<u:update id="org.example.ruletutorial">
<u:name>Rule Tutorial</u:name>
<u:version>1.1.0</u:version>
<u:author>Richard Olrichs</u:author>
<u:author-url>http://www.olrichs.nl</u:author-url>
<u:description>Creating an Extension project with Rules as a tutorial Exercise.</u:description>
<u:post-startup-hook></u:post-startup-hook>
<u:requirements>
<u:requires-extension id="oracle.ide.audit" minVersion="12.1.2.00.00" maxVersion="12.1.3.99.99"/>
</u:requirements>
</u:update>
</update-bundle>
This results in a bundle.xml as shown below:

After that, you see a section called “requirements”–extensions required by your extension. Here you will see most of the bundles you entered in the extension.xml dependencies tab.
After this, the creation of your bundle.xml is done.
7.2 Creating a deployment profile
Next, we need a deployment profile. Go to your project properties:
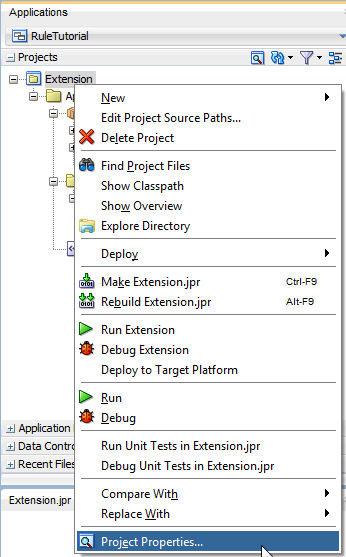
And then to the Deployment tab:

Here you see an existing Deployment Profile named “Extension (Extension JAR).” We will keep that and use it in the new profile we're going to create. Click the ‘New' button on the right side of the window.
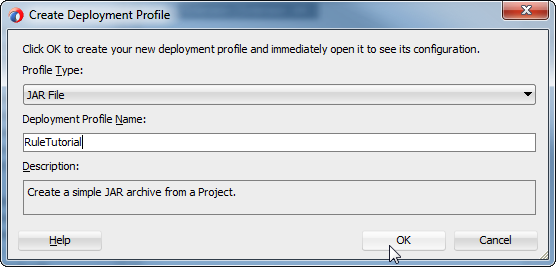
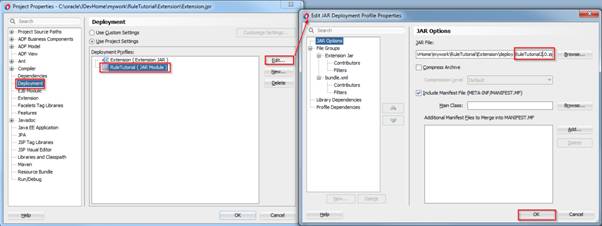
Choose JAR file and enter a Deployment Profile Name. Click OK.
In the next window, edit the JAR file to include a version number, and change the extension to .zip:

Now go to Profile Dependencies and select the Extension project:

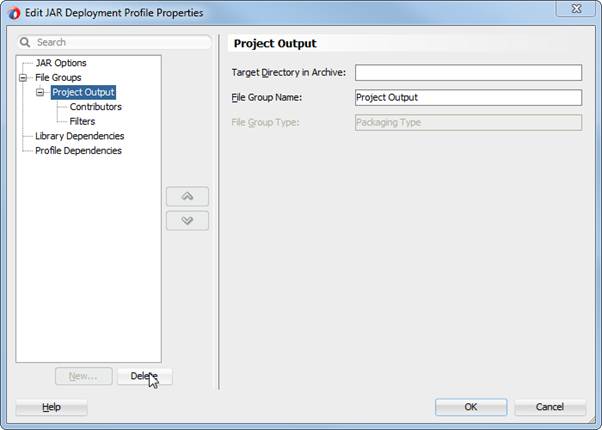
Select Project Output and click Delete:
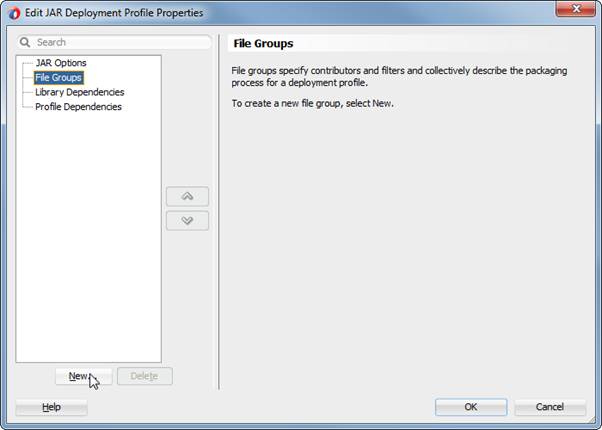
Now select File Groups again and click New:
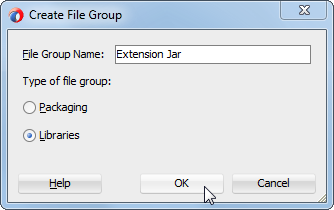
Enter “Extension Jar” in the File Group Name field, and choose Libraries as Type of file group. Click OK:

Go to Contributors and make sure the JAR file is selected:

Select File Groups once more and click New again:

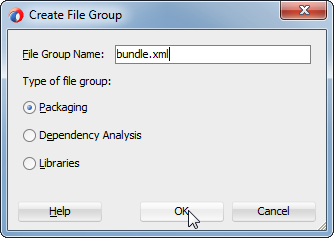
Enter "bundle.xml" as File Group Name, select Packaging, and click OK:
For the Target Directory, enter "META-INF" then click OK:

Leave the Contributors as default. Go to Filters and unselect everything except the bundle.xml, and click OK:

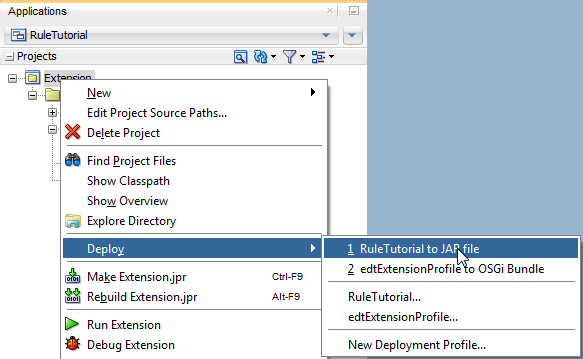
Now go to Deploy and select RuleTutorial :
Accept all defaults and click Finish:

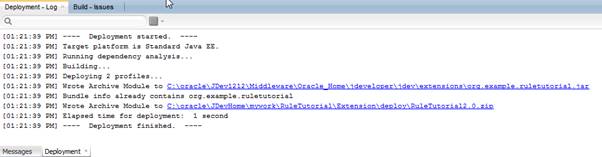
In the log window you can see that first the JAR file is recreated and then the zip file is generated:

7.3 Cleaning JDevs extensions and cache
Since we're constantly deploying our project to the target platform, JDeveloper may get confused about caching your extension. It's best to know how to clean the JDeveloper cache in case you have any problems running your extension.
This is not something that concerns your end user, but, if you develop extensions, you will run into this situation every now and then. So, before installing the zip file of the extension (just like a user of your extension would), we will show you how to clean the deployments to the target platform.
This involves a few steps.
Go to $JDEV_HOME and navigate to the \jdev\extensions directory:

Among the JAR files listed, select org.example.ruletutorial.jar and delete it.
Go to your JDeveloper system folder, find the system_cache folder, and delete it:

(Note: If JDeveloper is open, you might get an error, so close JDeveloper before deleting this folder.)
7.4 Create an Update Center
Start JDeveloper again.
Create a new XML file called RuleTutorialUC.xml:

The first part is pretty much the same as the bundle.xml:
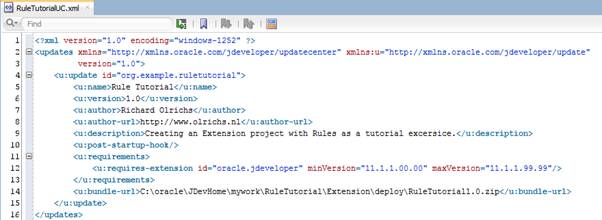
However, you need to add the bundle-url. Normally, this would typically be a network share or via an online URL. But for now it's pointing to the zip in the Deploy directory.
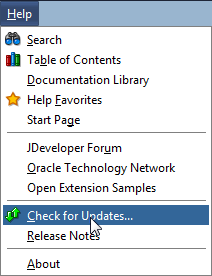
After creating this XML, we need to add a new Update Center to JDeveloper. Go to Help > Check for Updates:
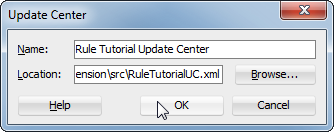
Click the Add button:

Enter a name, browse to the XML, then click OK:
You'll see that the Update Center is added:

Click Next.
Select the available update and click Next:
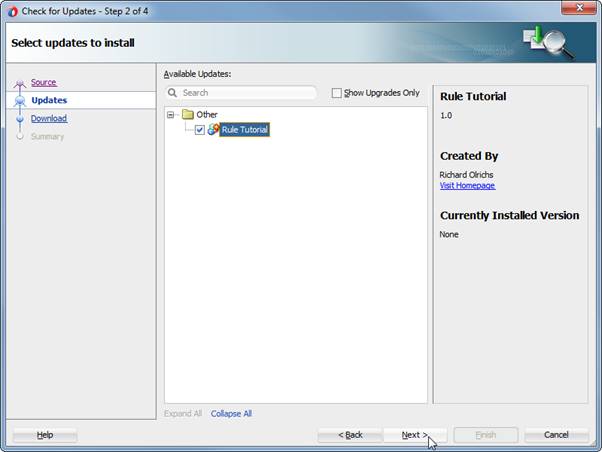
Click Finish on the last page:

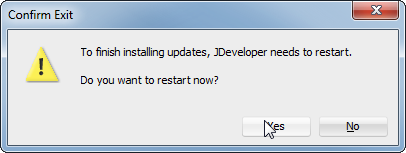
JDeveloper will ask if you want to restart. Click Yes:
After JDeveloper is restarted, we'll take a look at the power of this update center as an alternative to sharing your zip file with everyone.
Imagine more work has been done on your Extension and you're going to release version 2.0.
Update the bundle.xml to 2.0:

Update to 2.0 the RuleTutorial Deployment Profile that creates the zip file:
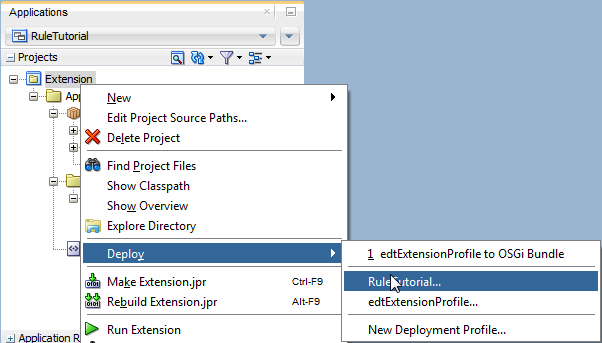
Deploy the RuleTutorial:
In your log you'll see that the 2.0 version has been created:
Now open the RuleTutorialUC.xml. This version has to be in sync, so change the version number to 2.0 here as well:

Go back to the Check for Updates menu.
Select the Update Center and unselect the others.
Click Next:

Now, without distributing the zip file, anyone who has installed the Update Center will be able to get the 2.0 version of your Extension project.
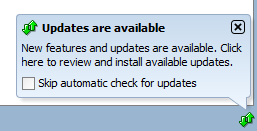
And if the automatic check for update is checked, on start up from JDeveloper, they will even see an alert like this:
8. Conclusion
During this tutorial you have seen the power of developing rules for Java and XML classes: with relatively little effort, you can code your company or project code guidelines in a rule, compelling developers to think about the quality of their code while writing it.
Apart from the basics of writing audit rules, you've built a custom fix to transform the source code with a violation. You have built and distributed a JDeveloper extension and learned how to create an update center for your development team.
All that's left is to put your newly gained knowledge into action.
Don't forget to check out the community effort named ADF EMG Audit Rules, in which the Oracle Code Guidelines are coded into audit rules. It presents a good example of how to implement different rules.
About the Authors
Oracle ACE Director Wilfred van der Deijl has been working with Oracle's development tools and database ever since getting his degree in Computer Science in 1995. An active member of the Oracle community, Wilfred is a blogger, author, Oracle customer advisory board member, and a frequent presenter at international conferences, including ODTUG and Oracle OpenWorld.
Oracle ACE Richard Olrichs is an Oracle Developer at MN, a techology company based in the Netherlands. Richard has extensive expertise in Oracle Fusion Middleware with deep specialization in the Oracle Application Development Framework. Richard initiated an open source project creating an ADF EMG Audit Rules extension for both JDeveloper 11g and JDeveloper12c, and was also one of the initiators of ADF EMG XML DataControl, an open source project for both JDeveloper ADF 11g and JDeveloper ADF 12c. Richard is has spoken at TECH13, Tech 14, and Oracle Open World 2014.
Note: This article has been reviewed by the relevant Oracle product team and found to be in compliance with standards and practices for the use of Oracle products.