by Gerrit Grunwald
A components library that attempts to fill a gap in the JavaFX list of features.
I love graphical programming, especially controls that visualize data. My favorite kind of controls are gauges, and I've spent a lot of time on them during the last seven years. It all started with the need for a gauge control when I was working for the semiconductor and nanotechnology industry back in 2009. From that point on, I was infected with the urge to create controls for all kind of platforms, such as Swing, JavaFX, HTML 5, and Android.
When JavaFX 2 came out, I was totally thrilled by the ease of use of the new APIs. Because JavaFX 2 came with charts, I hoped that gauges would be part of a future version of JavaFX, but that hasn't happened. So I decided to add some controls to the JFXtras project and to also create my own libraries, for example, SteelSeriesFX and Enzo.
The problem with all the gauges I've created during the last four years is that they always come with a special design, which might or might not fit your needs. In 2013, it got even worse when Apple released iOS 7, which was completely based on a flat UI design—which meant I also had to create controls with a flat UI design.
Long story short, when I started my vacation in December 2015, I decided to create another library for gauges...Medusa.

Figure 1. Medusa from Greek mythology
I thought about the most important features that all gauges have in common, and I came up with this little list of features:
- Title, subtitle, and unit
- Tickmarks
- Tickmark labels
- Needle and/or bar
- Colored sections and/or areas
In principle, that's all a gauge needs (of course, there are some more things, but they are not that important).
The Gauge Control
If you use a standard Medusa gauge in JavaFX, you will get something like what's shown in Figure 2.
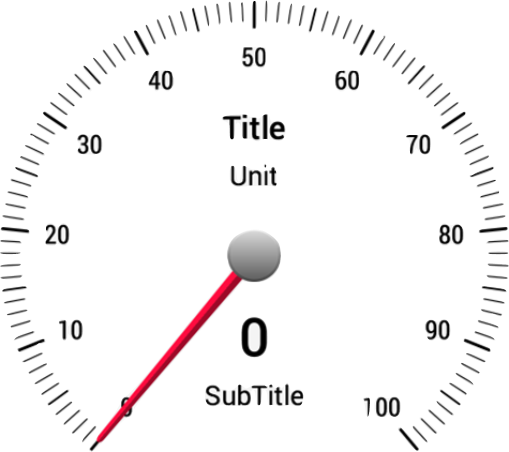
Figure 2. Standard Medusa gauge
This gauge doesn't look really fancy, but the big advantage of this approach is that you can embed this gauge into your own control very easily. That means that if you have your own style/design, you simply create a control that contains the frame and the background that you need and embed the Medusa standard gauge.
The FGauge Control
I've created a JavaFX control that demonstrates how embedding the Medusa standard gauge could look: the FGauge (F stands for Frame). Figure 3 is an example of what the FGauge looks like.

Figure 3. The FGauge control
As you can see, the inner part is similar to the Medusa standard gauge, but here we also have a frame around the gauge, a background, and a foreground.
So the main idea of Medusa is to use one gauge control class that contains all the properties a gauge needs and create skin classes for the different use cases, such as rich or flat gauges.
No CSS
If you take a look at the source code of Medusa, you will quickly figure out that I don't use any CSS for the gauges. The reasons for not using CSS for Medusa are the following. Using CSS for styling an application is a great idea and works pretty well in JavaFX, but it's not always nice to use CSS for controls. In my experience, you have to create a lot of boilerplate code to make a control styleable, especially if you have a lot of different parameters. In addition, the parsing of CSS in JavaFX is not always as fast as when you use code directly. Especially on embedded devices, you can see the difference when using a lot of CSS compared to using a pure-code approach. I agree that using CSS makes sense for styling applications and also for styling some controls, but I decided to not use it for the gauges.
If you really want to make use of CSS, you could always create a control that contains all the styleable properties you need and pass them to an embedded instance of a Medusa gauge.
Another reason to not use CSS for the gauges was the fact that nearly all of the time, programmers, not designers, will style the controls (that was originally the plan), and the CSS implementation in JavaFX is not really standard CSS but rather a subset that is based on CSS 2.1 that also uses different names for CSS properties (for example, background in CSS is -fx-background in JavaFX).
Some Code
Now that you know some things about the background and features of Medusa, let's have a look at some code.
I loved the builders that came with JavaFX 2 but were deprecated with JavaFX 8, so I've created a builder for most of the classes.
So if you would like to create a standard Medusa gauge with a range from 0 to 100 and a title, a subtitle, and a unit, you simply can use the following code snippet:
Gauge gauge = GaugeBuilder.create()
                      .title("Title")

                      .subTitle("SubTitle")

                      .unit("Unit")

                      .build();
This will give you the gauge that you saw in Figure 1. Because the gauge control contains a lot of features, it's really not easy to understand all the different parameters that are available. Therefore, I created a GaugeDemo class that mainly contains one standard Medusa gauge and a builder with most of the available features. With this class, you can easily play around with the different parameters to see their meaning. Listing 1 shows what the "full-size" GaugeBuilder looks like:
Gauge gauge = GaugeBuilder
 .create()

 .prefSize(500,500) // Set the preferred size of the control

 // Related to Foreground Elements

 .foregroundBaseColor(Color.BLACK)  // Defines a color foreground elements

 // Related to Title Text

 .title("Title") // Set the text for the title

 .titleColor(Color.BLACK) // Define the color for the title text

 // Related to Sub Title Text

 .subTitle("SubTitle") // Set the text for the subtitle

 .subTitleColor(Color.BLACK) // Define the color for the subtitle text

 // Related to Unit Text

 .unit("Unit") // Set the text for the unit

 .unitColor(Color.BLACK) // Define the color for the unit

 // Related to Value Text

 .valueColor(Color.BLACK) // Define the color for the value text

 .decimals(0) // Set the number of decimals for the value/lcd text

 // Related to LCD

 .lcdVisible(false) // Display a LCD instead of the plain value text

 .lcdDesign(LcdDesign.STANDARD) // Set the design for the LCD

 .lcdFont(LcdFont.DIGITAL\_BOLD) // Set the font for the LCD

 // Related to scale

 .scaleDirection(ScaleDirection.CLOCKWISE) // CLOCKWISE, COUNTER\_CLOCKWISE

 .minValue(0) // Set the start value of the scale

 .maxValue(100) // Set the end value of the scale

 .startAngle(320) // Start angle of your scale (bottom -> 0, direction -> CCW)

 .angleRange(280) // Angle range of your scale starting from the start angle

 // Related to Tick Labels

 .tickLabelDecimals(0) // Number of decimals for the tick labels

 .tickLabelLocation(TickLabelLocation.INSIDE) // Tick labels in- or outside the scale

 .tickLabelOrientation(TickLabelOrientation.HORIZONTAL) // ORTHOGONAL, TANGENT

 .onlyFirstAndLastTickLabelVisible(false) // Show only first and last tick label

 .tickLabelSectionsVisible(false) // Sections for tick labels should be visible

 .tickLabelSections(new Section(75, 100, Color.RED) // Sections to color tick labels

 .tickLabelColor(Color.BLACK) // Color for tick labels

 // Related to Tick Marks

 .tickMarkSectionsVisible(false) // Sections for tick marks should be visible

 .tickMarkSections(new Section(75, 100, Color.RED) // Sections to color tick marks

 // Related to Major Tick Marks

 .majorTickMarksVisible(true) // Major tick marks should be visible

 .majorTickMarkType(TickMarkType.LINE) // LINE, DOT, TRIANGLE, TICK\_LABEL

 .majorTickMarkColor(Color.BLACK) // Color for the major tick marks

 // Related to Medium Tick Marks

 .mediumTickMarksVisible(true) // Medium tick marks should be visible

 .mediumTickMarkType(TickMarkType.LINE) // LINE, DOT, TRIANGLE

 .mediumTickMarkColor(Color.BLACK) // Color for the medium tick marks

 // Related to Minor Tick Marks

 .minorTickMarksVisible(true) // Minor tick marks should be visible

 .minorTickMarkType(TickMarkType.LINE) // LINE, DOT, TRIANGLE

 .minorTickMarkColor(Color.BLACK) // Color for minor tick marks

 // Related to LED

 .ledVisible(false) // LED should be visible

 .ledType(LedType.STANDARD) // STANDARD, FLAT

 .ledColor(Color.rgb(255, 200, 0)) // Color of the LED

 .ledBlinking(false) // LED should blink

 // Related to Needle

 .needleShape(NeedleShape.ANGLED) // ANGLED, ROUND, FLAT

 .needleSize(NeedleSize.STANDARD) // THIN, STANDARD, THICK

 .needleColor(Color.CRIMSON) // Color of the needle

 // Related to Needle behavior

 .startFromZero(false) // Needle should start from the 0 value

 .returnToZero(false) // Needle should always return to the 0 value

 // Related to Knob

 .knobType(KnobType.STANDARD) // STANDARD, METAL, PLAIN, FLAT

 .knobColor(Color.LIGHTGRAY) // Color that should be used for the center knob

 .interactive(false) // Should be possible to press the center knob

 .onButtonPressed(buttonEvent -> System.out.println("Knob pressed"))

 .onButtonReleased(buttonEvent -> System.out.println("Knob released"))

 // Related to Threshold

 .thresholdVisible(false) // Threshold indicator should be visible

 .threshold(50) // Value for the threshold

 .thresholdColor(Color.RED) // Color for the threshold

 .checkThreshold(false) // Check each value against threshold

 .onThresholdExceeded(thresholdEvent -> System.out.println("Threshold exceeded"))

 .onThresholdUnderrun(thresholdEvent -> System.out.println("Threshold underrun"))

 // Related to Gradient Bar

 .colorGradientEnabled(false) // Gradient filled bar should be visible

 .gradientLookupStops(new Stop(0.0, Color.BLUE), // Gradient for gradient bar

                      new Stop(0.25, Color.CYAN),

                      new Stop(0.5, Color.LIME),

                      new Stop(0.75, Color.YELLOW),

                      new Stop(1.0, Color.RED))

 // Related to Sections

 .sectionsVisible(false)  // Sections will be visible

 .sections(new Section(50, 75, Color.ORANGE) // Sections that will be drawn

 .checkSectionsForValue(false) // Check current value against each section

 // Related to Areas

 .areasVisible(false) // Areas will be visible

 .areas(new Section(75, 100, Color.RED))  // Areas that will be drawn

 // Related to Markers

 .markersVisible(false) // Markers will be visible

 .markers(new Marker(75, "Marker 1", Color.HOTPINK) // Markers that will be drawn

 // Related to Value

 .animated(false) // Needle will be animated

 .animationDuration(500)  // Speed of the needle in milliseconds (10 - 10000 ms)

 .onValueChanged(o -> System.out.println(((DoubleProperty) o).get()))

 .build();
Listing 1. Code for "full-size" GaugeBuilder
That's a lot of code, but it describes nearly every property that is available in the standard Medusa gauge. If you then want to use this gauge within the FGauge control at a size of 500x500 pixels, you can use the following code.
FGauge fGauge = FGaugeBuilder
 .create()

 .prefSize(500, 500)

 .gauge(gauge)

 .gaugeDesign(GaugeDesign.METAL)

 .gaugeBackground(GaugeBackground.CARBON)

 .foregroundVisible(true)

 .build();
This should help you to play around with the Gauge and FGauge in Medusa, but there's more. I've also created some additional skins that might come in handy. They are shown in Figure 4 through Figure 16.
| 
Figure 4. SlimSkin | 
Figure 5. FlatSkin |
| 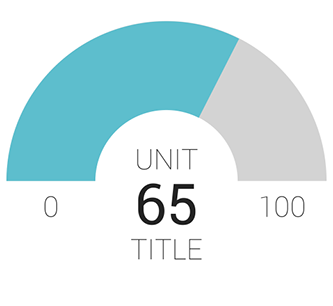
Figure 6. DashboardSkin | 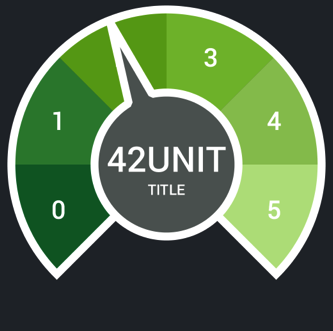
Figure 7. SimpleSkin |
| 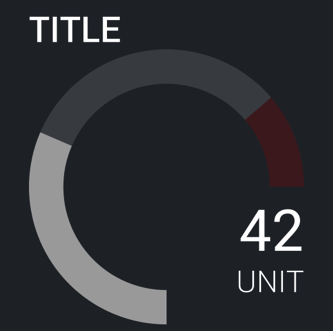
Figure 8. SpaceSkin | 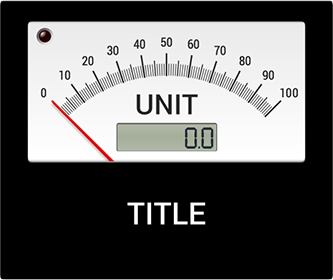
Figure 9. AmpSkin |
| 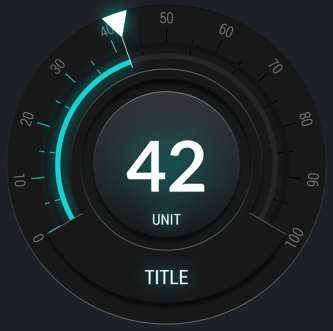
Figure 10. ModernSkin | 
Figure 11. IndicatorSkin |
| 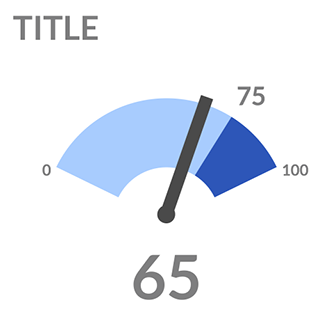
Figure 12. KpiSkin | 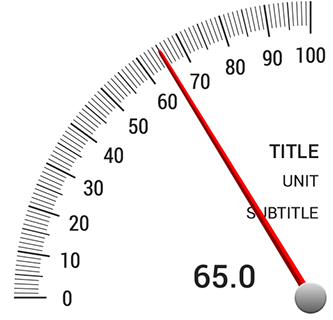
Figure 13. QuarterSkin |
| 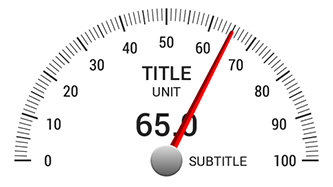
Figure 14. HSkin | 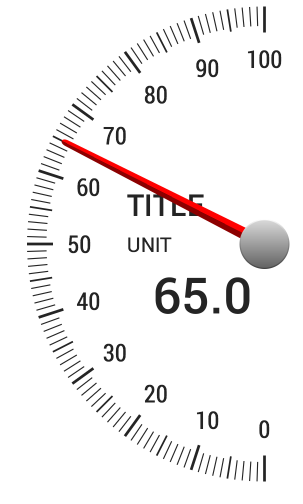
Figure 15. VSkin |
| 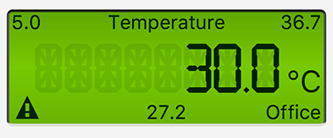
Figure 16. LcdSkin | |
To make it more convenient for you to use these skins, I've added a skin() parameter to the GaugeBuilder. In addition, each of these skins needs some of the gauge parameters to be set to specific values. These presets will also be done by the GaugeBuilder class.
Let's take a look at the ModernSkin as an example. One way of using it is shown in Listing 2.
Gauge gauge = new Gauge();
gauge.setSkin(new ModernSkin(gauge));
gauge.setTitle("TITLE");
gauge.setUnit("UNIT");
gauge.setDecimals(0);
gauge.setValueColor(Color.WHITE);
gauge.setTitleColor(Color.WHITE);
gauge.setSubTitleColor(Color.WHITE);
gauge.setBarColor(Color.rgb(0, 214, 215));
gauge.setNeedleColor(Color.WHITE);
gauge.setThresholdColor(Color.rgb(204, 0, 0));
gauge.setTickLabelColor(Color.rgb(151, 151, 151));
gauge.setTickMarkColor(Color.BLACK);
gauge.setTickLabelOrientation(TickLabelOrientation.ORTHOGONAL);
Listing 2. ModernSkin example
But a more convenient way would be using the GaugeBuilder, as follows:
Gauge gauge = GaugeBuilder.create()
            .skin(ModernSkin.class)

            .title("TITLE")

            .unit("UNIT")

            .build();
So, for all the available skins, the easiest way is to use the GaugeBuilder and set only the values that are needed.
A Simple Dashboard
With this approach, you could easily create a little Internet of Things (IoT) dashboard using around 100 lines of code, as shown in Listing 3:
public class Main extends Application {
 private GridPane pane;

 private Gauge    steps;

 private Gauge    distance;

 private Gauge    activeCalories;

 private Gauge    foodCalories;

 private Gauge    weight;

 private Gauge    bodyFat;

  @Override public void init() {

     GaugeBuilder builder = GaugeBuilder.create().skin(SlimSkin.class);

     steps          = builder.decimals(0).maxValue(10000).unit("STEPS").build();

     distance       = builder.decimals(2).maxValue(10).unit("KM").build();

     activeCalories = builder.decimals(0).maxValue(2200).unit("KCAL").build();

     foodCalories   = builder.decimals(0).maxValue(2200).unit("KCAL").build();

     weight         = builder.decimals(1).maxValue(85).unit("KG").build();

     bodyFat        = builder.decimals(1).maxValue(20).unit("%").build();

      VBox stepsBox        = getTopicBox("STEPS", Color.rgb(77,208,225), steps);

     VBox distanceBox     = getTopicBox("DISTANCE", Color.rgb(255,183,77), distance);

     VBox foodCaloriesBox = getTopicBox("FOOD", Color.rgb(129,199,132), foodCalories);

     VBox weightBox       = getTopicBox("WEIGHT", Color.rgb(149,117,205), weight);

     VBox bodyFatBox      = getTopicBox("BODY FAT", Color.rgb(186,104,200), bodyFat);

     VBox actvCaloriesBox = getTopicBox("ACTIVE CALORIES", Color.rgb(229,115,115),

                                          activeCalories);

       pane = new GridPane();

     pane.setPadding(new Insets(20));

     pane.setHgap(10);

     pane.setVgap(15);

     pane.setBackground(new Background(new BackgroundFill(Color.rgb(39,44,50), CornerRadii.EMPTY, Insets.EMPTY)));

     pane.add(stepsBox, 0, 0);

     pane.add(distanceBox, 1, 0);

     pane.add(actvCaloriesBox, 0, 2);

     pane.add(foodCaloriesBox, 1, 2);

     pane.add(weightBox, 0, 4);

     pane.add(bodyFatBox, 1, 4);
}
@Override public void start(Stage stage) {
     Scene scene = new Scene(pane);

     steps.setValue(5201);

     distance.setValue(3.12);

     activeCalories.setValue(347);

     foodCalories.setValue(1500);

     weight.setValue(78.7);

     bodyFat.setValue(14.2);

     stage.setTitle("Medusa Dashboard");

     stage.setScene(scene);

     stage.show();

 }
@Override public void stop() { System.exit(0); }
private VBox getTopicBox(final String TEXT, final Color COLOR, final Gauge GAUGE) {
     Rectangle bar = new Rectangle(200, 3);

     bar.setArcWidth(6);

     bar.setArcHeight(6);

     bar.setFill(COLOR);

     Label label = new Label(TEXT);

     label.setTextFill(COLOR);

     label.setAlignment(Pos.CENTER);

     label.setPadding(new Insets(0, 0, 10, 0));

     GAUGE.setBarColor(COLOR);

     GAUGE.setBarBackgroundColor(Color.rgb(39,44,50);

     GAUGE.setAnimated(true);

     VBox vBox = new VBox(bar, label, GAUGE);

     vBox.setSpacing(3);

     vBox.setAlignment(Pos.CENTER);

     return vBox;

 }

  public static void main(String\[\] args) { launch(args); }
}
Listing 3. Example IoT dashboard
The code in Listing 3 will give you the simple dashboard shown in Figure 17.
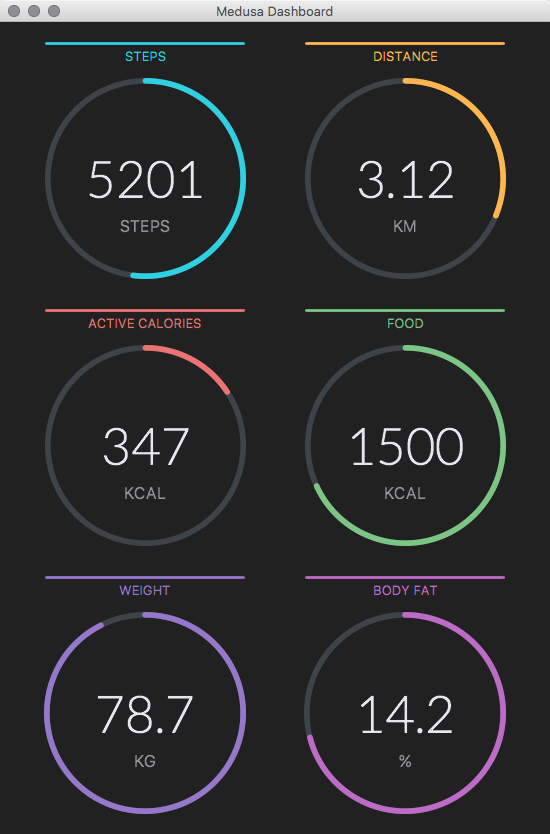
Figure 17. Example IoT dashboard
Conclusion
I hope this Medusa library will be useful. I will add more skins and documentation (Javadoc, blogposts, and demos) in the future. If you have any needs for a special skin, let me know: han.solo.gg@gmail.com. I will try to add your suggested skin to the library, if it makes sense for others, too.
The Medusa library is available under the Apache 2.0 license, which will give you all the freedom you need—whether you would like to use it in a commercial project or in an open source project.
See Also
About the Author
Gerrit Grunwald is a software engineer with more than ten years of experience in software development. He has been involved in Java desktop application and controls development. Gerrit is interested in Java on the desktop and Java-driven embedded technologies based on Oracle Java SE Embedded. He is a true believer in open source and has participated in popular projects such as JFXtras.org as well as creating his own projects (Medusa, Enzo, SteelSeries Swing, and SteelSeries Canvas).
Gerrit blogs regularly on subjects related to the IoT, Java, and JavaFX, and he is an active member of the Java community, where he founded and leads the Java User Group Münster (Germany). He is a JavaOne Rock Star and a Java Champion. He is also a speaker at conferences and user groups internationally and writes for several magazines.
Join the Conversation
Join the Java community conversation on Facebook, Twitter, and the Oracle Java Blog!