Step-by-step instructions for how to configure Oracle Enterprise Manager 13_c_ to manage Oracle ZFS Storage Appliance
The Oracle ZFS Storage Appliance family of products consists of Oracle's entry-level engineered storage systems, which are based on the Zeta File System (ZFS) and Oracle Solaris symmetric multiprocessing (SMP). These storage appliances offer several unique features for DBAs, including the following:
- The Hybrid Columnar Compression (HCC) feature of Oracle Database, which offers columnar storage to any Oracle Database 11_g_ Release 2 or 12_c_ database
- Oracle Intelligent Storage Protocol, which—when paired with Oracle Database 12_c_—offers dynamic self-tuning of the appliances for database workloads
- Hybrid Storage Pools for dynamic caching between DRAM
- Solid-state technology seamlessly and traditional hard disk drives, allowing 90 percent of I/O operations to be served from the fastest possible medium
What's more, you can download a simulator that enables you to test all of these features utilizing an Oracle VirtualBox system.
Oracle Enterprise Manager 13_c_ offers the ability to manage a truly converged environment through the entire stack, from the network all the way up to the application. This includes the storage appliances in the data center. Oracle Enterprise Manager plugins are available for the Oracle ZFS Storage Appliance family of products, the Oracle All Flash FS1-2 Flash Storage System, the Oracle FS1-2 hybrid storage system, as well as several third-party storage arrays.
Managing an Oracle ZFS Storage Appliance with Oracle Enterprise Manager is not difficult to configure, but there are several steps:
This article will run through this process step by step.
Prepare the Storage Appliance
First, you will need to access the storage appliance though its browser-based interface (BUI) and log in as the root user. The URL for doing this is normally [https://](/docs/DOC-994924)_$IP-address_:215, with http://192.168.1.10:215 being a sample address. If the IP address is also in domain name system (DNS), the DNS entry will also work.
In order to prepare the storage appliance, we will run a preinstallation workflow. A workflow on the storage appliance is a script that can be installed and executed by the storage appliance administrator. To do this, navigate to the Maintenance area of the appliance's BUI.
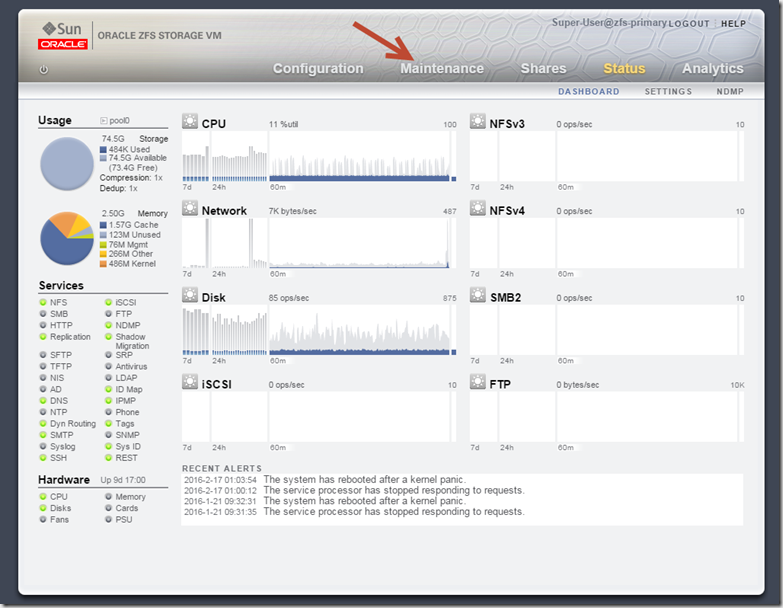
Figure 1. Maintenance area of the BUI
The Maintenance area is used to perform storage appliance maintenance tasks, such as gathering logs for support, performing upgrades, or troubleshooting hardware issues. You also run workflows from there. Click the Workflows option.
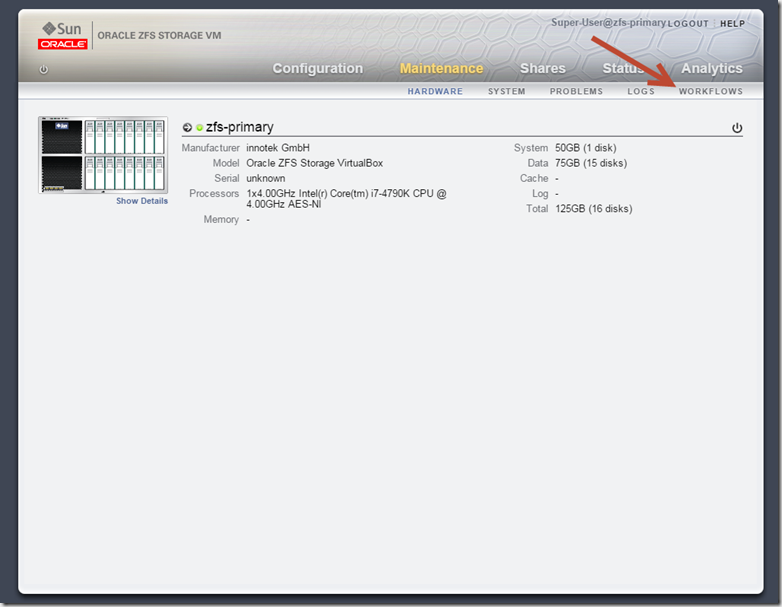
Figure 2. Workflows option
By default, several workflows are available. To prepare the storage appliance to be managed by Oracle Enterprise Manager, select the Configure for Oracle Enterprise Manager Monitoring workflow. 
Figure 3. Available workflows
A dialog box appears. Enter the password for the oracle_agent user. Click Apply to execute the workflow.

Figure 4. Entering the password for the oracle_agent user
The workflow will take several minutes to run, most of the time being spent in the last step.

Figure 5. Running the workflow
Once the workflow completes, click OK.

Figure 6. Workflow complete
The storage appliance is now prepared for Oracle Enterprise Manager. All the remaining steps are performed in Oracle Enterprise Manager 13_c_.
Download the Plugin
A plug-in is a prepackaged group of files that extends the functionality of Oracle Enterprise Manager. Many plugins are available for free from Oracle, and there is also an exchange where you can download plugins developed by third parties.
The Oracle Enterprise Manager Plug-in for Oracle ZFS Storage Appliance provides monitoring and provisioning functionality to Oracle Enterprise Manager. In addition to the monitoring and notification features inherent to Oracle Enterprise Manager, the plugin enables storage-level create, edit, and delete operations for selected users.
Before we deploy the plugin, it is best to download the latest version. Log in to Oracle Enterprise Manager 13_c_ as SYSMAN, and select Setup->Extensibility->Self Update.
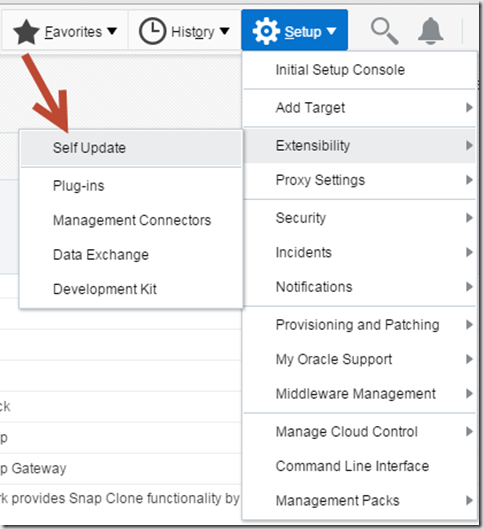
Figure 7. Selecting the Self Update option
Next, scroll down and select Plug-in in the Type column.
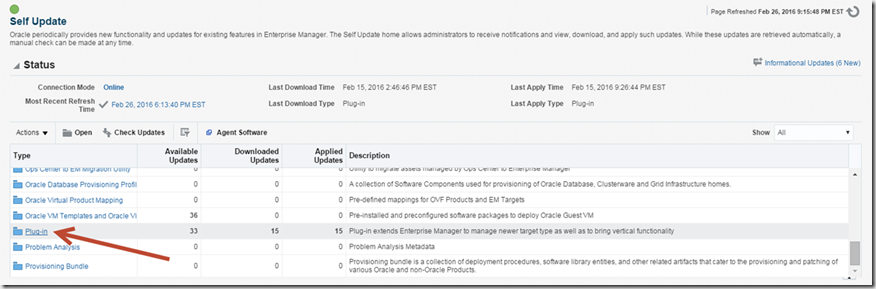
Figure 8. Selecting the type of update
You can scroll down though all of the plugins, but it is easier to simply search for "ZFS."
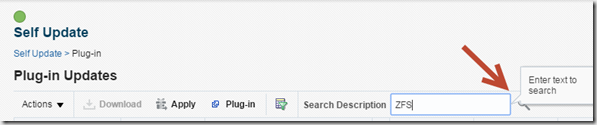
Figure 9. Searching for the plugin
The search results should show multiple versions of the plugin. Select the latest version and click Download. 
Figure 10. Downloading the plugin
You can schedule downloads for "after hours," but the plugin is small. So go ahead and download it now by selecting Immediately and clicking Select. As a note, you can also download infrastructure as a service (IaaS) templates for Oracle VM, and those downloads can be larger and are often scheduled for later.

Figure 11. Scheduling the download
Click Job Details to monitor the download.

Figure 12. Getting job details
A Jobs screen should appear, in which you can monitor the download. Once the download is complete it is time to install the plugin. 
Figure 13. Monitoring the download
Install the Plugin on Oracle Enterprise Manager
The next step is to deploy the plugin to the Oracle Enterprise Manager server. In Oracle Enterprise Manager, select Setup -> Extensibility -> Plug-Ins.

Figure 14. Selecting the Plug-ins option
Next, scroll down the list, and expand the Servers, Storage and Network section. Highlight Oracle ZFS Storage App and click Deploy On -> Management Servers.
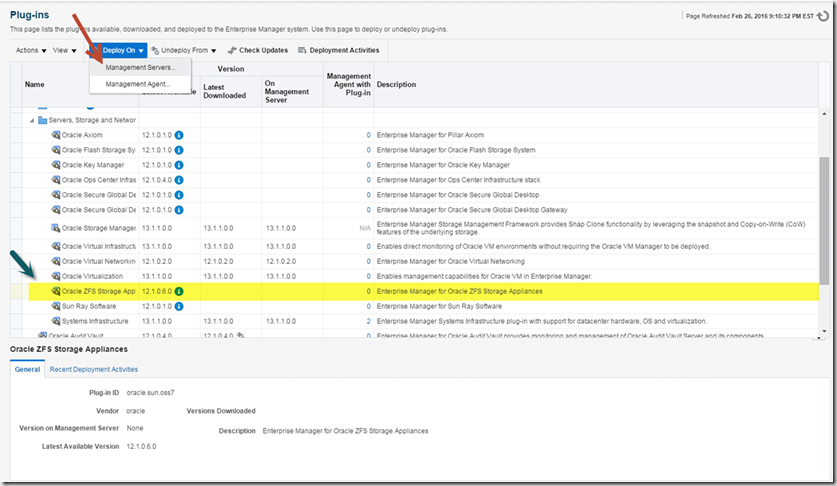
Figure 15. Selecting where to deploy the plugin
In the To Deploy list, you should see the plugin version that will be deployed. Click Next. 
Figure 16. Plugin version to deploy
Several prerequisite checks will be done, which can take several minutes. Once completed, click Next. 
Figure 17. Prerequisite checks
Installing the plugin will require SYS credentials to the Oracle Management Repository database. In the example shown in the following figure, the credential name, DB_SYS_PASSWORD, and details have been specified. Click Next to continue.
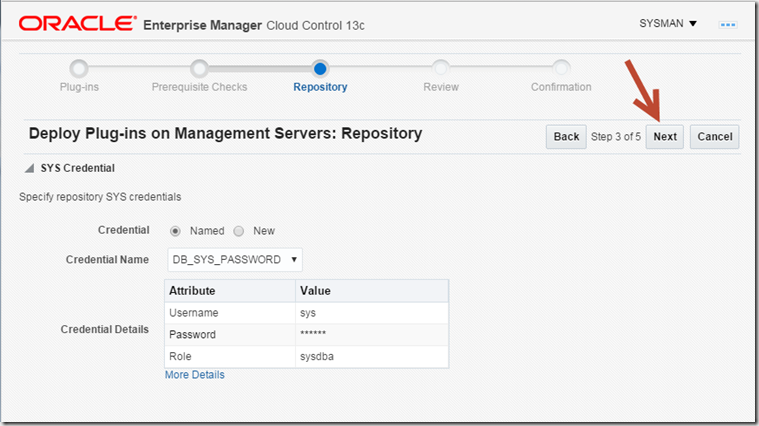
Figure 18. Filling in credentials
You are now ready to deploy the plugin. Click Deploy to continue.
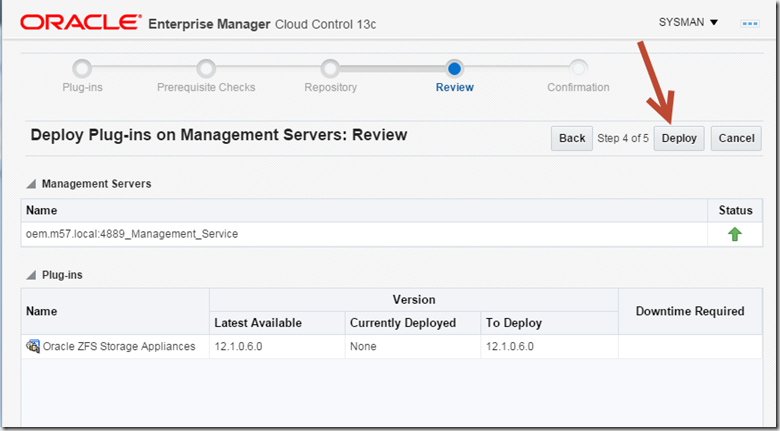
Figure 19. Deploying the plugin
The deployment will start. You can monitor it via the BUI or from the command line.

Figure 20. Confirmation that the deployment has begun
Let's monitor the deployment from the BUI. Select Setup -> Extensibility -> Plug-Ins.

Figure 21. Preparing to monitor the deployment
At the top of the Plug-Ins screen, click the Deployment Activities option.

Figure 22. Selecting Deployment Activities
You will now see the status of the plugins currently being deployed. The Oracle Enterprise Manager Plug-in for Oracle ZFS Storage Appliance can take a while to install.

Figure 23. Checking the status of the plugin deployment
Wait for the job to complete, which can take 10 to 20 minutes. Once it is complete, continue to the next step to deploy the plugin on an agent.
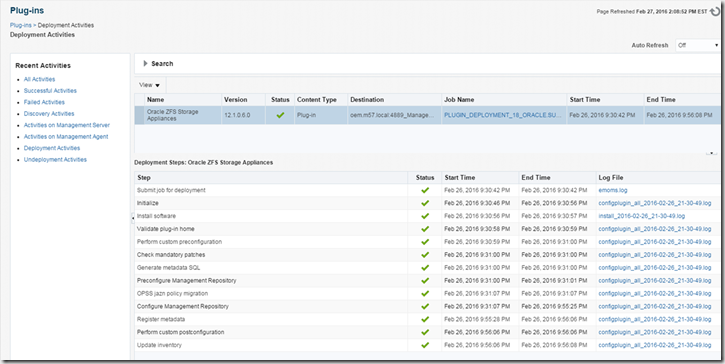
Figure 24. Plugin deployment is complete
Install the Plugin on the Agents
Unlike many of the plugins, the Oracle Enterprise Manager Plug-in for Oracle ZFS Storage Appliance also needs to be installed on at least one agent. The agent will communicate with Oracle ZFS Storage Appliance and report back to Oracle Enterprise Manager. In most deployments, you will use the agent running on the Oracle Enterprise Manager servers.
The next step is to deploy the plugin to the Oracle Enterprise Manager server. In Oracle Enterprise Manager, select Self Update -> Extensibility -> Plug-Ins.

Figure 25. Preparing to install the plugin on an agent
Next, scroll down the list, expand the Servers, Storage and Network section, and highlight Oracle ZFS Storage App. Then click Deploy On -> Management Agent.
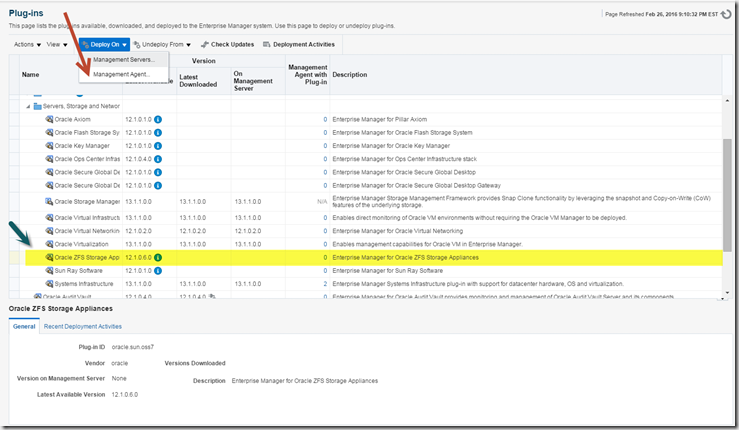
Figure 26. Selecting the Deploy On -> Management Agent option
You should next see the plugin version to deploy. Click Next.
You can now select the version of the agent to be deployed. Select the latest version and click Continue. 
Figure 27. Selecting the version to deploy
Unlike the Management Server deployment, you will need to select what agents the plugin will be deployed on. Normally you will select the agent on the Oracle Enterprise Manager server. Larger deployments might have agents dedicated to offloading this type of functionality. Once your agent has been selected, click Continue.
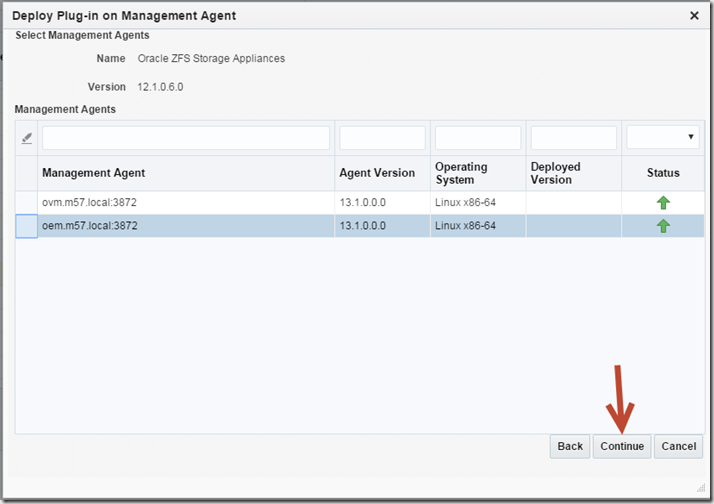
Figure 28. Selecting the agent
The deployment process will check the agent. Click Next to start the prerequisite checks.

Figure 29. Prerequisite checks
Once the checks are complete, you should see the Deploy Plug-in on Management Agent screen. As a note, the plugin deployment will not require a restart. Click Deploy to install the plugin on the selected agent.
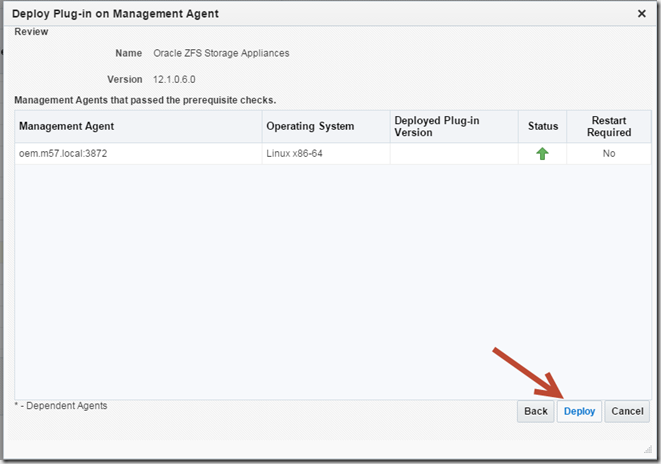
Figure 30. Starting the deployment of the plugin on the agent
A new deployment dialog box will appear. You can monitor the deployment status via the command line, or select Show Status to monitor via the BUI.
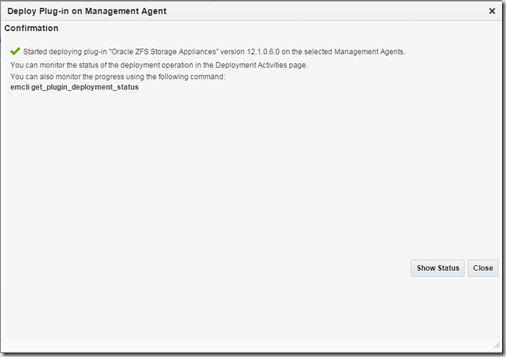
Figure 31. Confirmation that the deployment has begun
Again, we are using the BUI to monitor the deployment. Once the deployment is complete, continue to the last step. 
Figure 32. Plugin deployment is complete
Manually Add the Storage Appliance
As with many of the hardware, storage, and network targets in Oracle Enterprise Manger, the administrator needs to manually add them using a guided process. To start this process, from the main menu, select Setup -> Extensibility -> Add Targets Manually.
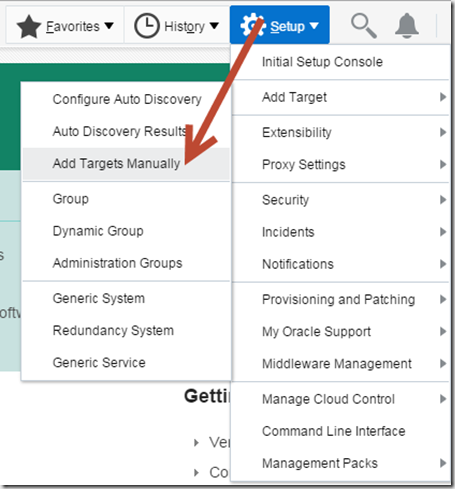
Figure 33. Selecting the Add Targets Manually option
You should now see the Overview page. Because we will be using the guided process, click Add Using Guided Process. As a note, this has changed a little compared to the process for Oracle Enterprise Manager 12_c_, but the overall process is similar.
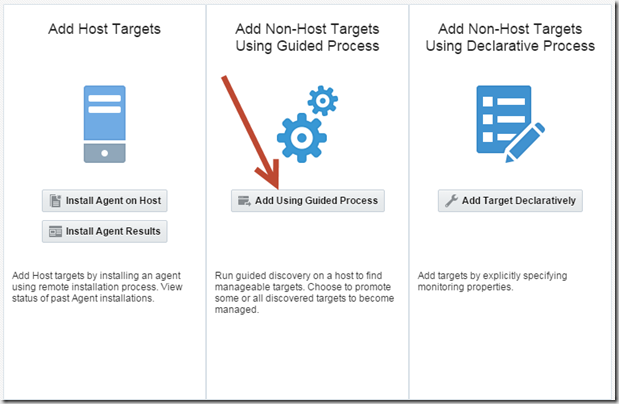
Figure 34. Selecting to use the guided process
Next, scroll down until you see the item in the Guided Discovery column called Systems Infrastructure ZFS Storage Appliance Controller. Note that there are several hardware monitoring processes in Oracle Enterprise Manager 13_c_, so be certain to select the correct one.
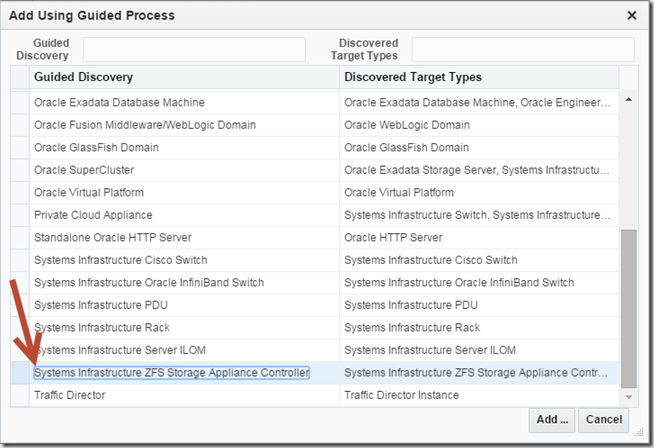
Figure 35. Selecting the correct guided discovery item
In the dialog box that appears, enter the target name, the target's IP address or DNS name, and the username and password that Oracle Enterprise Manager will use to connect to the Oracle ZFS Storage Appliance. In this example, "zfs" is the DNS name.
Also select the Agent EMD URL, which basically identifies what agent will be monitoring the storage appliance. Click the search icon next to this field.

Figure 36. Searching for the Agent EMD URL
A selection dialog box appears. In the example shown in the following figure, oem.m57.local is used. Select your agent and click Select.
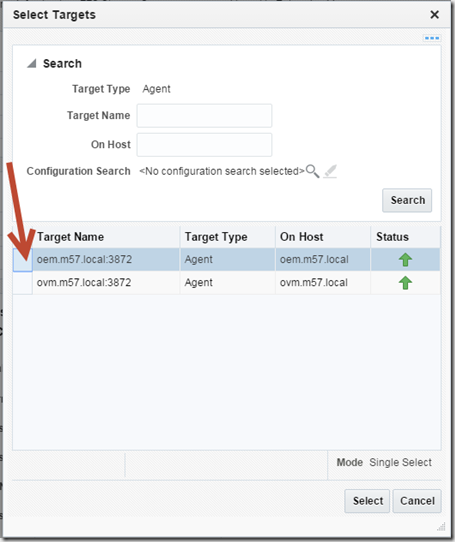
Figure 37. Selecting the target
You should now be back at the Discovery screen. "Trust but verify" is a common system administrator practice and should always be followed when working with systems, so we will first test the connectivity between all the components. Select Test Connection to perform the test.
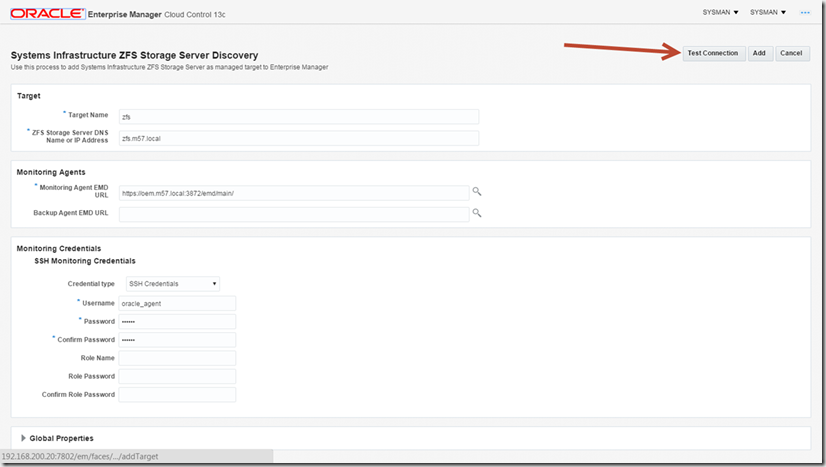
Figure 38. Testing the connection
No errors are reported in the following figure, but if you have any issues, resolve them before moving to the next step, which is when the storage appliance is added to Oracle Enterprise Manager. Resolving any issues here will be easier and faster than fixing a broken deployment.
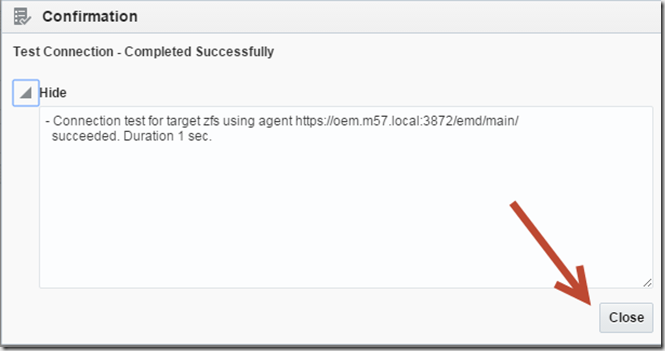
Figure 39. Successful connection test
Once the test produces a clean bill of health, click Add to discover the storage appliance within Oracle Enterprise Manager. 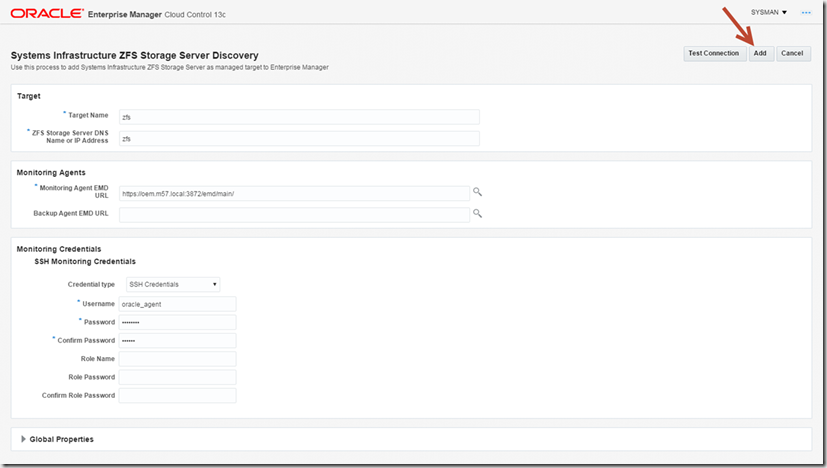
Figure 40. Adding the target
The "add target" process should successfully complete. Note that the discovery of the storage appliance will take several minutes. Now is a great time to get an extra cup of coffee.

Figure 41. Target added successfully
Next, we can look at the storage appliance. Do not do this immediately, because the discovery process will take several minutes. Take a few minutes and check out the Oracle ZFS Storage Appliance community on the Oracle Technology Network while the process runs.