This document was created with help and input from Christophe Pauliat from the EMEA Oracle Solutions Center.
Introduction
In November 2017 I published a community document on using Infrastructure as a code with Terraform to provision Oracle Linux and support infrastructure within Oracle Cloud Infrastructure (OCI); this document will discuss the same approach using Ansible. For further details on Ansible, please refer here; in essence, Ansible is open source software providing provisioning and configuration management features.
My environment
My setup at home is a laptop which is running Oracle Virtual Box which hosts a virtual machine running Oracle Linux (OL) 7 update 6. The OL7 VM was installed as a minimal install with the addition of developer tools. The VM has the Oracle Virtual Box guest additions package installed and within the networking has a rule configured where I can access the VM via a terminal window using port forwarding with SSH. The VM is up to date with the latest patches from the Oracle Public Yum channels and is subscribed to the EPEL developer channel in order to access python version 3.6, pip and virtualenv. I have an account within OCI and am part of the London availability domain.
Setup
For this exercise I am referring to the following OCI documentation for getting started with OCI and Ansible.
Install OCI Python SDK
The OCI Python SDK enables us to write code to manage and provide OCI resources. I am using virtualenv which is recommended as you can install the versions and modules you want without impacting other python virtualenv or global installations.
Firstly lets see what version of python we are running:
[simon@ol7 ~]$ python -V
Python 2.7.5
I want to use the latest version of python available to us for Oracle Linux 7 which at the time of writing is version 3.6.X. I am using the Oracle public yum and have run the updated /usr/bin/ol_yum_configure.sh script as well as enabled EPEL access (sudo yum install oracle-epel-release-el7).
To install python36 we need to run the following:
[simon@ol7 ~]$ sudo yum install python36-pip
Once installed we can confirm the python version by running:
[simon@ol7 ~]$ python3 --version
Python 3.6.8
We then need to use pip3.6 to install and upgrade pip as well as install the virtual environment:
[simon@ol7 ~]$ sudo pip3.6 install --upgrade pip virtualenv virtualenvwrapper
We can now run pip3:
[simon@ol7 ~]$ pip3 --version
pip 19.2.1 from /usr/local/lib/python3.6/site-packages/pip (python 3.6)
Now we need to install and activate the virtual environment, it is recommended to perform this from your home directory. The virtualenv command below will create a directory called py3env-ansible (my choice, you can use whatever name you want for the virtual environment) and within this directory will be the python executable files along with the pip library. The source command will active the virtual environment, this will be identified by an addition of the virtual environment name, in my example (py3env-ansible) [simon@ol7 ~]$. From this point any package we install using pip will be placed within our virtual environment, isolated from the global python installation.
[simon@ol7 ~]$ virtualenv py3env-ansible
Using base prefix '/usr'
No LICENSE.txt / LICENSE found in source
New python executable in /home/simon/py3env-ansible/bin/python3.6
Also creating executable in /home/simon/py3env-ansible/bin/python
Installing setuptools, pip, wheel...
done.
[simon@ol7 ~]$ source py3env-ansible/bin/activate
(py3env-ansible) [simon@ol7 ~]$
Next install the OCI SDK:
(py3env-ansible) [simon@ol7 ~]$ pip3 install oci
Install Ansible and Ansible OCI modules
Following on from the previous step, run the following to install Ansible:
(py3env-ansible) [simon@ol7 ~]$ pip3 install ansible
Next we need to install the Ansible OCI modules, firstly we need to ensure that git is installed (sudo yum info git), if not then use yum to install it. It makes sense to install the Ansible OCI modules in the py3env-ansible directory which is within your home directory:
(py3env-ansible) [simon@ol7 ~]$ pwd
/home/simon
(py3env-ansible) [simon@ol7 ~]$ ls
py3env-ansible
(py3env-ansible) [simon@ol7 ~]$ cd py3env-ansible/
(py3env-ansible) [simon@ol7 ~]$ git clone https://github.com/oracle/oci-ansible-modules.git
(py3env-ansible) [simon@ol7 py3env-ansible]$ cd oci-ansible-modules
(py3env-ansible) [simon@ol7 oci-ansible-modules]$ ./install.py
We can now check the ansible version:
(py3env-ansible) [simon@ol7 py3env-ansible]$ ansible --version
ansible 2.8.3
config file = None
configured module search path = ['/home/simon/.ansible/plugins/modules', '/usr/share/ansible/plugins/modules']
ansible python module location = /home/simon/py3env-ansible/lib/python3.6/site-packages/ansible
executable location = /home/simon/py3env-ansible/bin/ansible
python version = 3.6.8 (default, May 16 2019, 05:58:38) [GCC 4.8.5 20150623 (Red Hat 4.8.5-36.0.1)]
Create a test area
You can now create your own ansible playbooks; you should create a directory to store these new playbooks and its useful to create directories for each test. In my environment I created a directory called oci-ansible-modules-tests which is in my home area: /home/simon/py3env-ansible/oci-ansible-modules. You can use the documentation to create a test playbook which looks for storage object buckets within your OCI tenancy.
Configure OCI access
I have an OCI account in the London availability domain. On my local VM where I will be driving ansible from I need to create some keys to access OCI resources; this is documented here.
Firstly we need to create a .oci directory within our home directory which will contain data needed for communication with OCI, then we will generate and display the keys.
(py3env-ansible) [simon@ol7 oci-ansible-modules]$ cd
(py3env-ansible) [simon@ol7 ~]$ mkdir ~/.oci
(py3env-ansible) [simon@ol7 ~]$ openssl genrsa -out ~/.oci/oci_api_key.pem 2048
(py3env-ansible) [simon@ol7 ~]$ chmod go-rwx ~/.oci/oci_api_key.pem
(py3env-ansible) [simon@ol7 ~]$ openssl rsa -pubout -in ~/.oci/oci_api_key.pem -out ~/.oci/oci_api_key_public.pem
(py3env-ansible) [simon@ol7 ~]$ openssl rsa -pubout -outform DER -in ~/.oci/oci_api_key.pem | openssl md5 -c
(py3env-ansible) [simon@ol7 ~]$ cat ~/.oci/oci_api_key_public.pem
Using the documentation upload your public key.
We also need to create a config file which is stored in the .oci directory. This file contains tenancy, user and fingerprint details needed for our access.
(py3env-ansible) [simon@ol7 ~]$ cd ~/.oci
Using your favourite editor create a file called config and fill in the areas needed, the example below is for my access:
[simon@ol7 .oci]$ cat config
[DEFAULT]
tenancy = ocid1.tenancy.oc1..XX
user = ocid1.user.oc1..XX
fingerprint = 7b:XX:XX:XX:XX:XX:XX:XX:XX:XX:XX:XX:XX:XX:XX:XX
key_file = /home/simon/.oci/oci_api_key.pem
region = uk-london-1
Use the OCI documentation to gather tenancy, user and other details to correctly populate this file. The fingerprint is the output of the API key which is then displayed in the OCI UI which is described within the documentation.
Using the sample playbooks
Within the /home/simon/py3env-ansible/oci-ansible-modules directory there is a samples directory. Within here there are sub directories with example / sample playbooks which can be used to demonstrate functionality. These are also available to browse here within github.
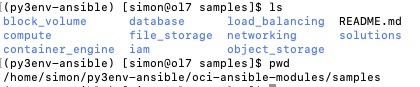
You can see that there are various areas of functionality, for our use we will use a launch instance example (launch_compute_instance) which is under the compute directory.

The README file should be reviewed as for this example there are three environment variables that need to be set in the OS before we run the sample.yaml playbook. This example will setup a virtual cloud network (VCN) and supporting networking (including security lists) within OCI then create an instance. The playbook will then test and display the results of an SSH to the public IP of the instance, finally the instance will be terminated as well as all supporting networking. You could edit the sample.yaml playbook and insert a pause or hold before teardown.yaml is run, however the access to the instance is via keys created by the playbook which are deleted when the playbook has run.
For this playbook I need to export the following environment variables:
(py3env-ansible) [simon@ol7 ~]$ export SAMPLE_AD_NAME=MOFr:UK-LONDON-1-AD-1
(py3env-ansible) [simon@ol7 ~]$ export SAMPLE_COMPARTMENT_OCID=ocid1.compartment.oc1..XX
(py3env-ansible) [simon@ol7 ~]$ export SAMPLE_IMAGE_OCID=ocid1.image.oc1.uk-london-1.XX
The availability domain information can be gathered using the directions here; the compartment information here. The image ID can be chosen from the documentation, please note this is location dependent (ie my Oracle Linux 7 is in London and referenced within this OL7 image page).
Once we have exported our environment variables we are ready to run the playbook.
Navigate to the oci-ansible-modules/samples/compute/launch_compute_instance directory, in my case /home/simon/py3env-ansible/oci-ansible-modules/samples/compute/launch_compute_instance.
Run the playbook:
(py3env-ansible) [simon@ol7 launch_compute_instance]$ ansible-playbook sample.yaml
If you are swapping between terminals and need to re-activate your python virtual environment do the following (within my environment), note the absence of (py3env-ansible) will indicate the virtual environment is not active:
[simon@ol7 ~]$ source ~/py3env-ansible/bin/activate
You can test this by running:
(py3env-ansible) [simon@ol7 launch_compute_instance]$ ansible --version
To deactivate run the following:
(py3env-ansible) [simon@ol7 launch_compute_instance]$ deactivate
[simon@ol7 launch_compute_instance]$
The playbook should run through successfully and print out areas of interest where you can see OCI infrastructure being created as well as any tests being run such as the SSH to the instance test:
TASK [set_fact] ************************************************************************************************
ok: [localhost]
TASK [Print the public ip of the newly launched instance] ******************************************************
ok: [localhost] => {
"msg": "Public IP of launched instance 132.145.24.124"
}
TASK [Wait (upto 5 minutes) for port 22 to become open] ********************************************************
ok: [localhost]
TASK [Attempt a ssh connection to the newly launced instance] **************************************************
changed: [localhost]
TASK [Print SSH response from launched instance] ***************************************************************
ok: [localhost] => {
"msg": "SSH response from instance -> ['Linux mytestinstance 4.14.35-1902.3.1.el7uek.x86_64 #2 SMP Mon Jun 24 21:25:29 PDT 2019 x86_64 x86_64 x86_64 GNU/Linux']"
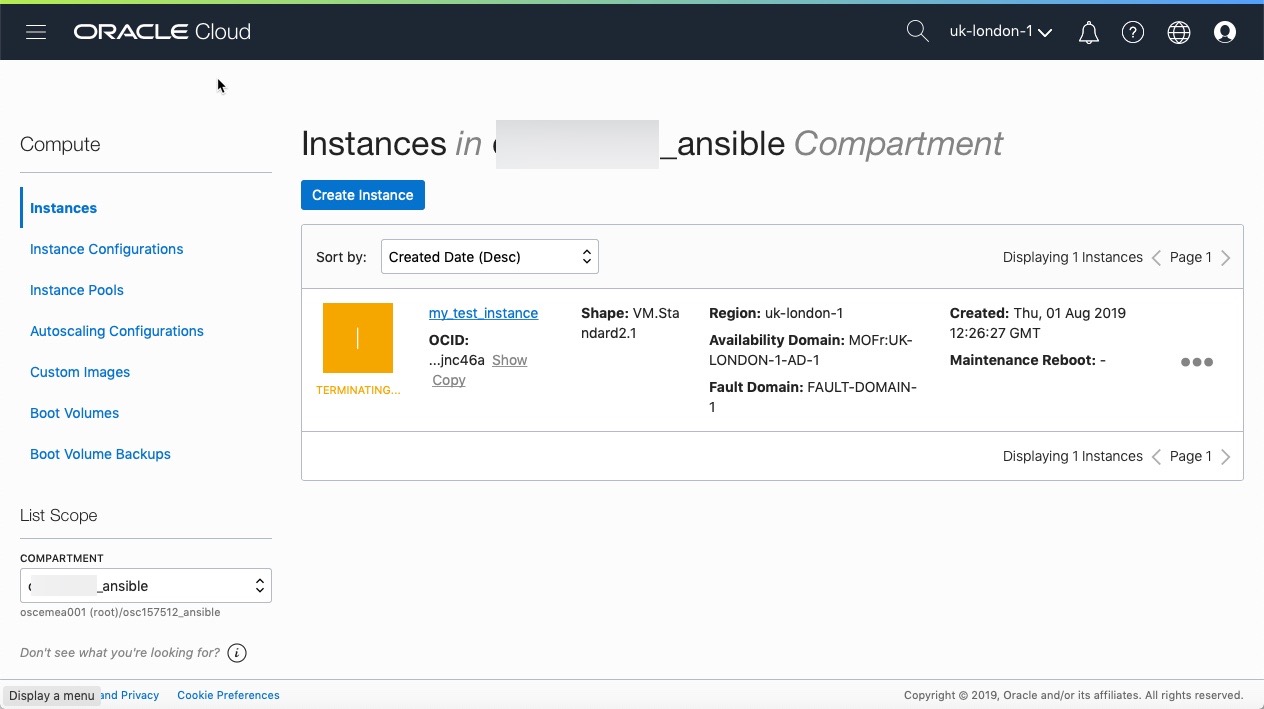
At the end of the playbook the instance and associated networking will be terminated:
ASK [Terminate the instance] **********************************************************************************
changed: [localhost]
TASK [Delete the subnet] ***************************************************************************************
changed: [localhost]
TASK [Delete the security list] ********************************************************************************
changed: [localhost]
TASK [Delete the route table] **********************************************************************************
changed: [localhost]
TASK [Delete the Internet Gateway] *****************************************************************************
changed: [localhost]
TASK [Delete the VCN] ******************************************************************************************
changed: [localhost]
PLAY RECAP *****************************************************************************************************
localhost : ok=38 changed=18 unreachable=0 failed=0 skipped=1 rescued=0 ignored=0
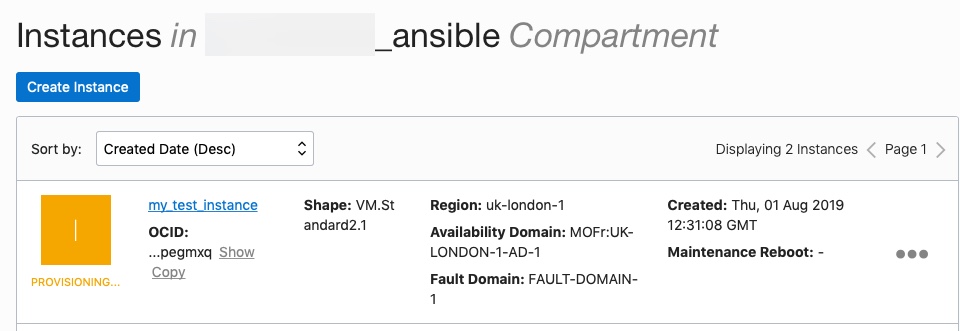
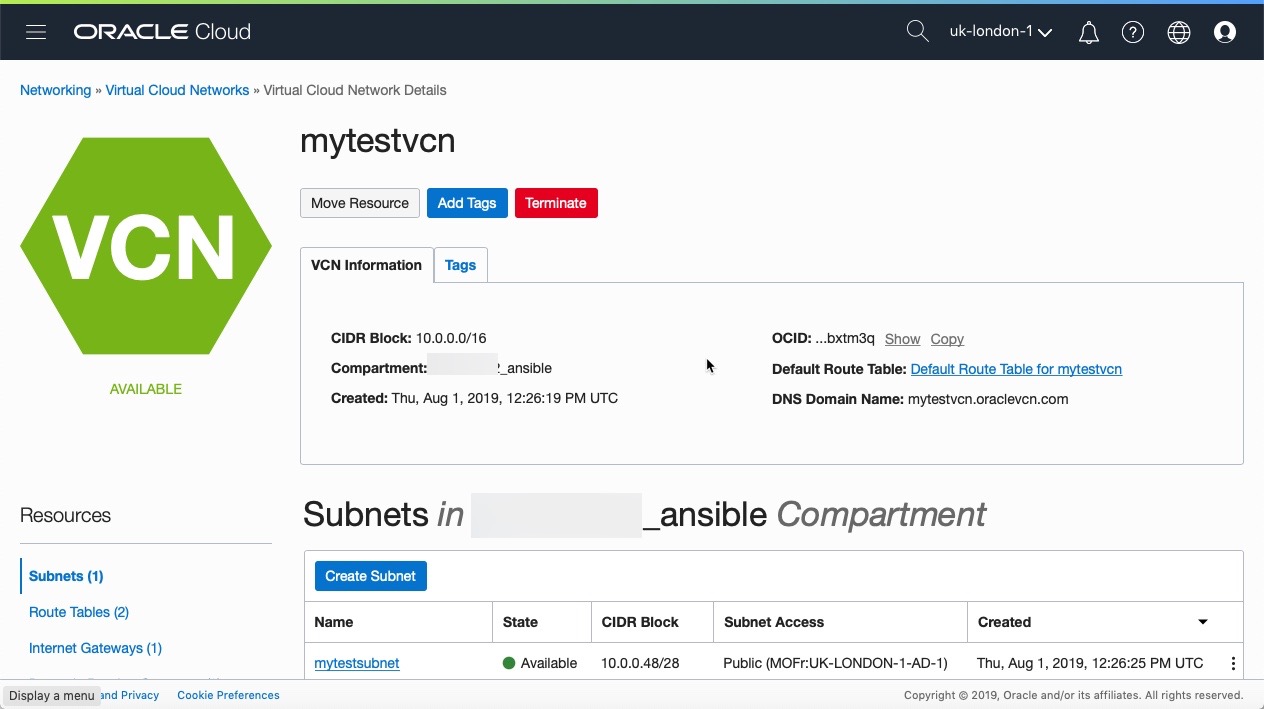
You can also view the progress and changes via the OCI UI: