Introduction
B2C Service can be coupled with other systems to perform integrations for various services. The sensitive data for performing integrations are to be handled very carefully. People often tend to use configuration settings, Extension/Add-in properties, hard-coded credentials etc for managing credentials within service cloud. It is always recommended to use auth tokens which are short lived like JWT, session tokens or other auth tokens. In case you need to use plain text for authentication, try to encrypt the text using base64 and add it in config settings. The encrypted text can be decrypted just before using it with authentication. Apart from storing values directly in config settings and using it directly in BUI extensions (anywhere on client side), we could use some out of the box functionalities like XO and custom script for handling the authentications. Few of the options are discussed below.
Working with Sensitive data in BUI Extensions
You must be very careful while performing authentication with external services through the BUI console, since the extensions are executed on web browsers (client side). We should never access the sensitive information on client side, since there is high possibility of passwords and other sensitive information getting compromised. Currently there are two methods to handle sensitive data for authentication if you are working on BUI Extensions.
Using External Objects (XO)
Using PHP Custom Scripts
Using External Objects (XO)
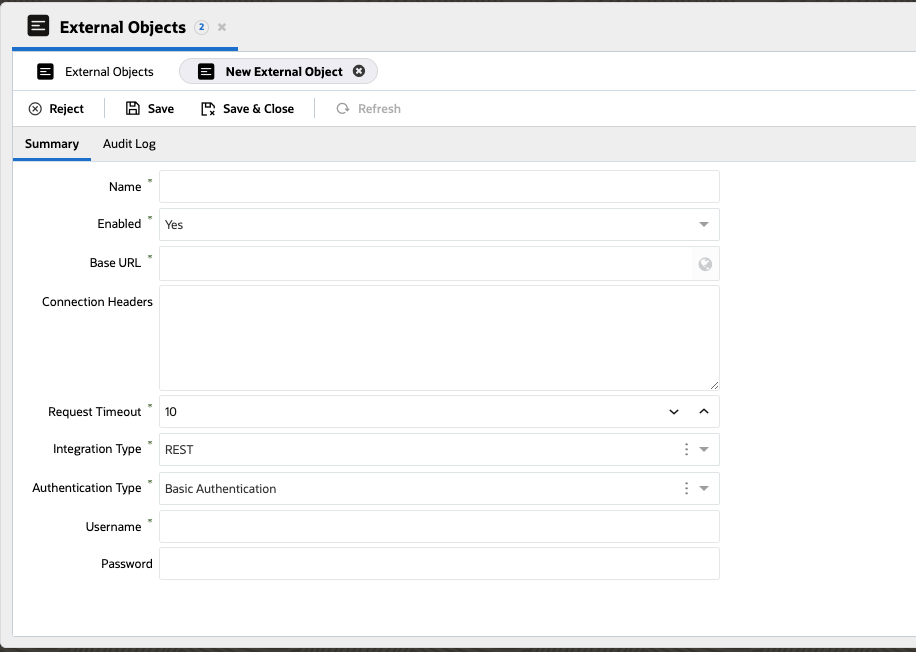
The XO will act as a proxy between BUI extensions and API service , relaying the data passed from BUI to the endpoint. The credentials and other sensitive headers can be configured within XO itself. The configured credentials will be encrypted and stored in the DB. It supports different authentication flows like Basic Authentication, Bearer Token, OAuth2 and Session Token. XO is the preferred option for communicating with external services. By default XO is not available along with Agent BUI. For getting the XO, access customers have to raise an SR with support.
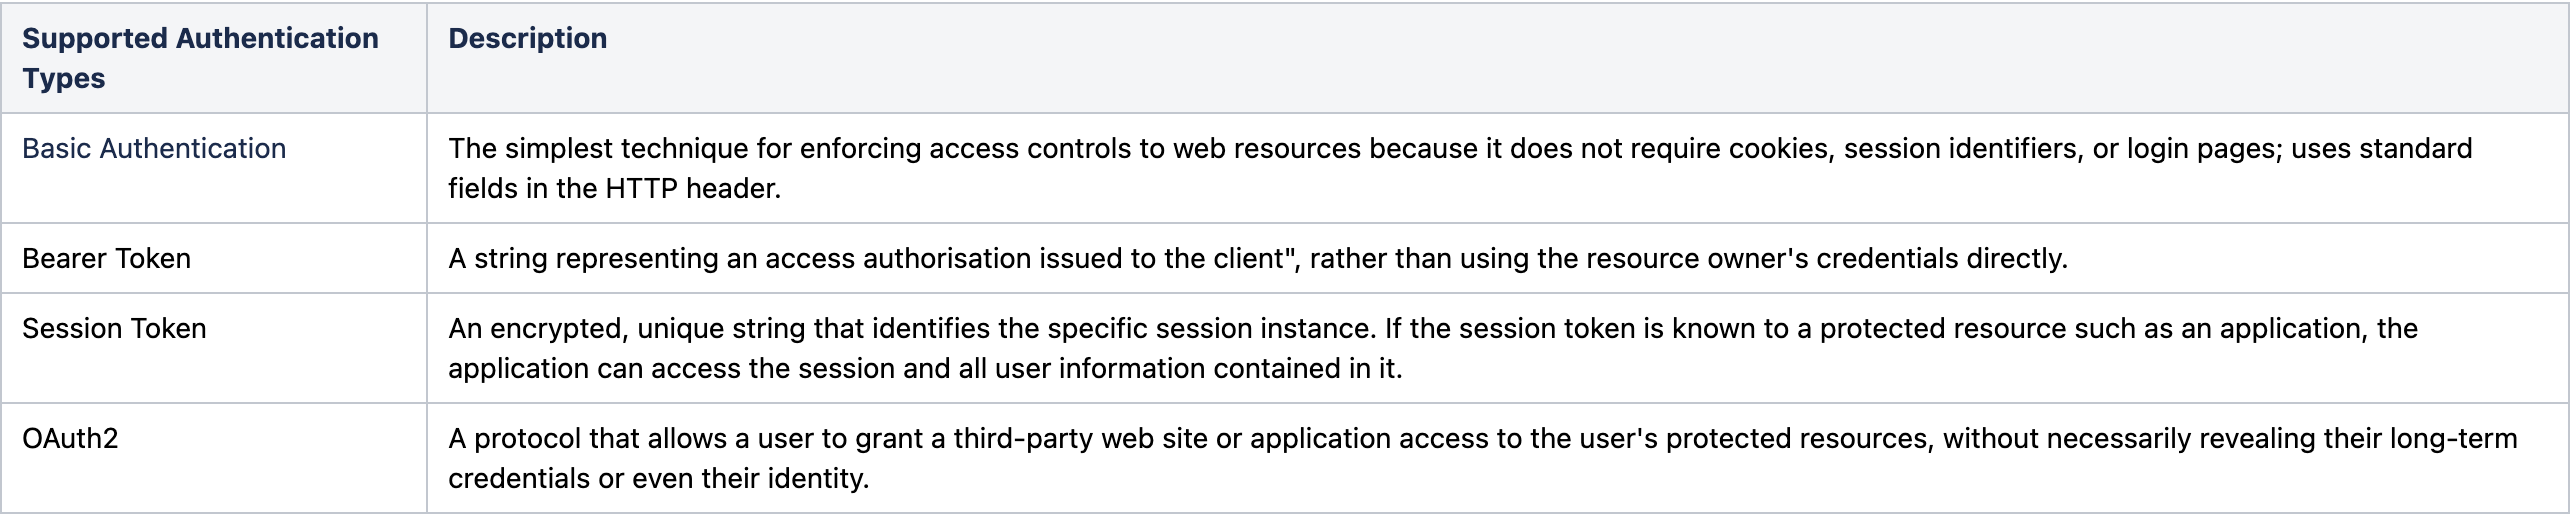
Authentication Types supported by XO
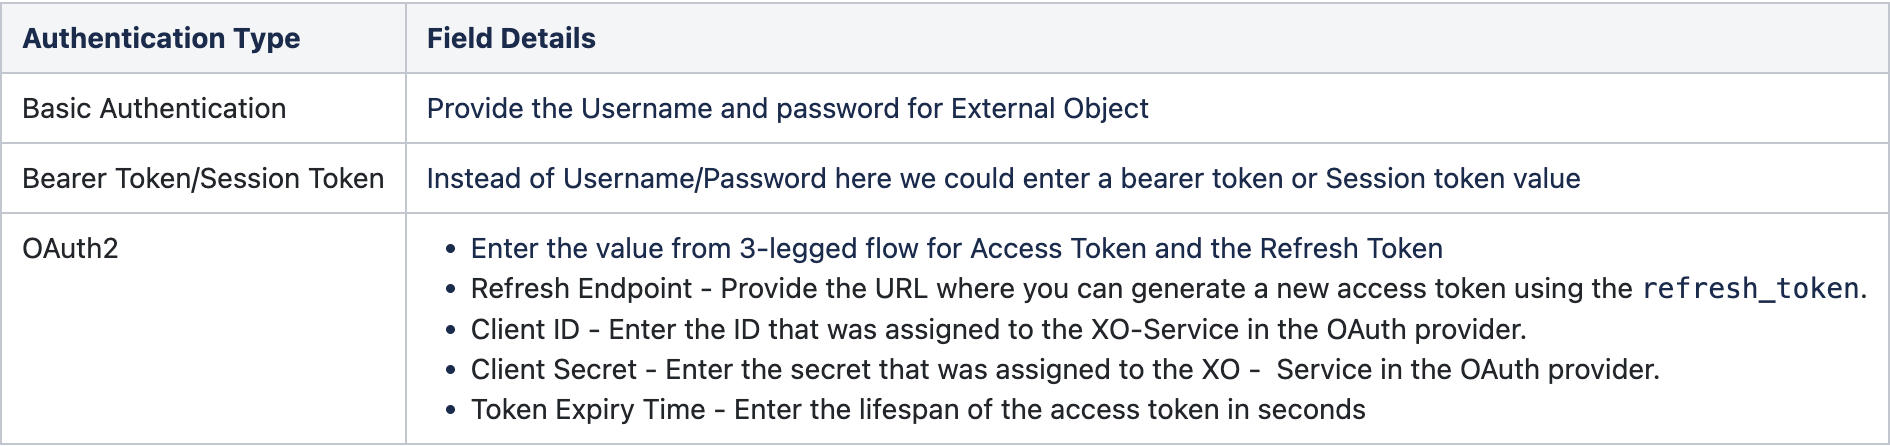
 Fields need to be updated based on selected Authentication Type
Creating XO Connection
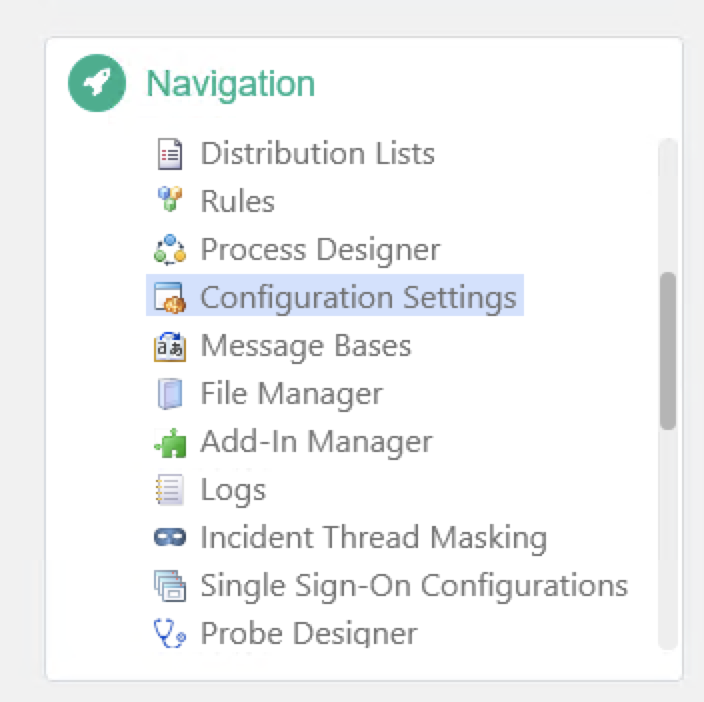
Click the Navigation Menu icon on the top left
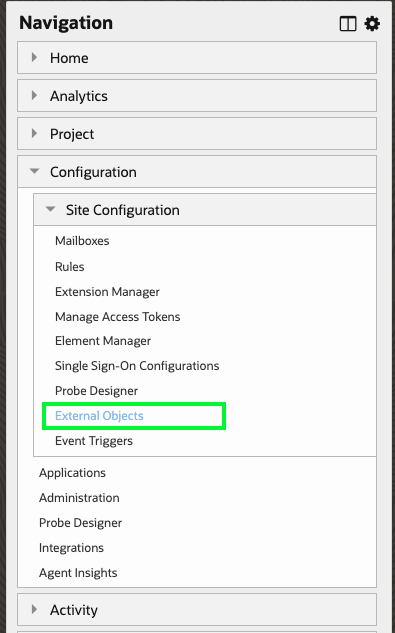
 Select External Objects from Configuration/Site Configuration
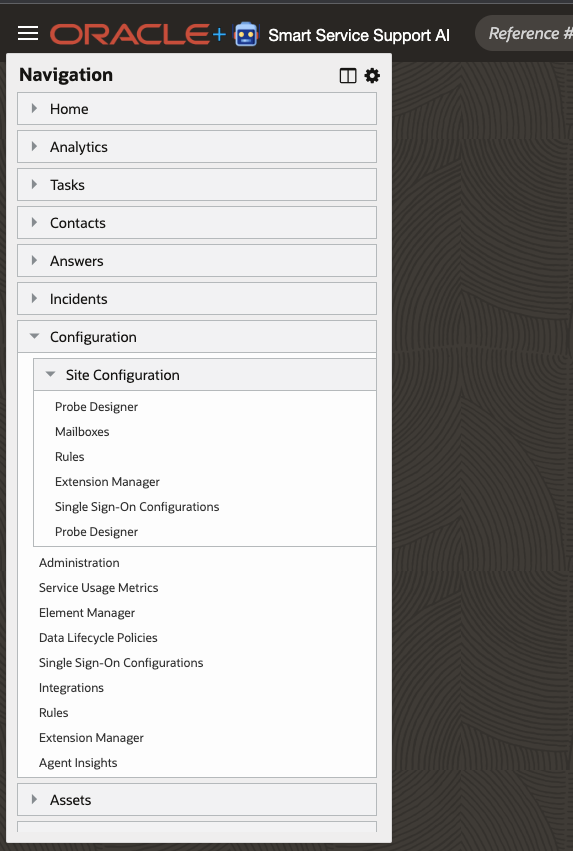
 There can be scenario where the XO will be added to the navigation set by default. If not, could follow the step below to add XO to the navigation set.
 From the navigation menu click the gear icon on the top, and click + button add new item against your required folder. Choose External objects from Components -> Common folder and click save.
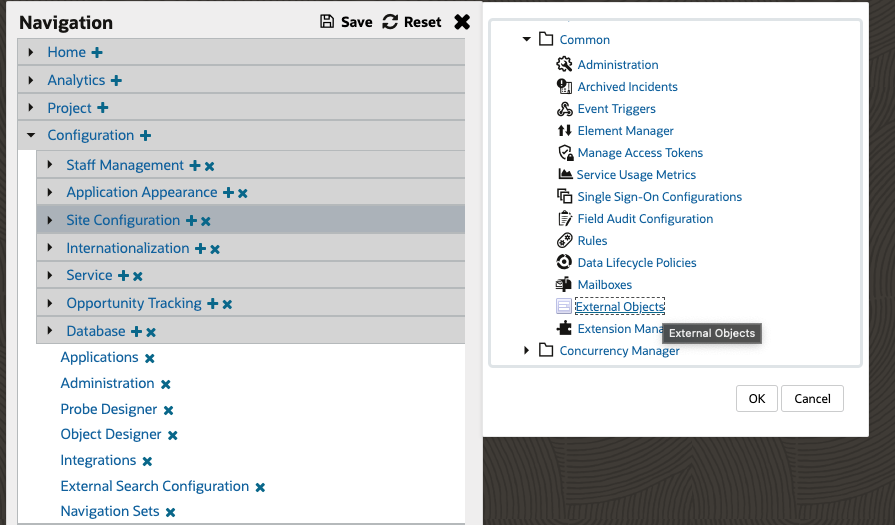 Note: If the External Objects are not present in common folder, you may have to raise a service request with the support team to enable the same for your site.
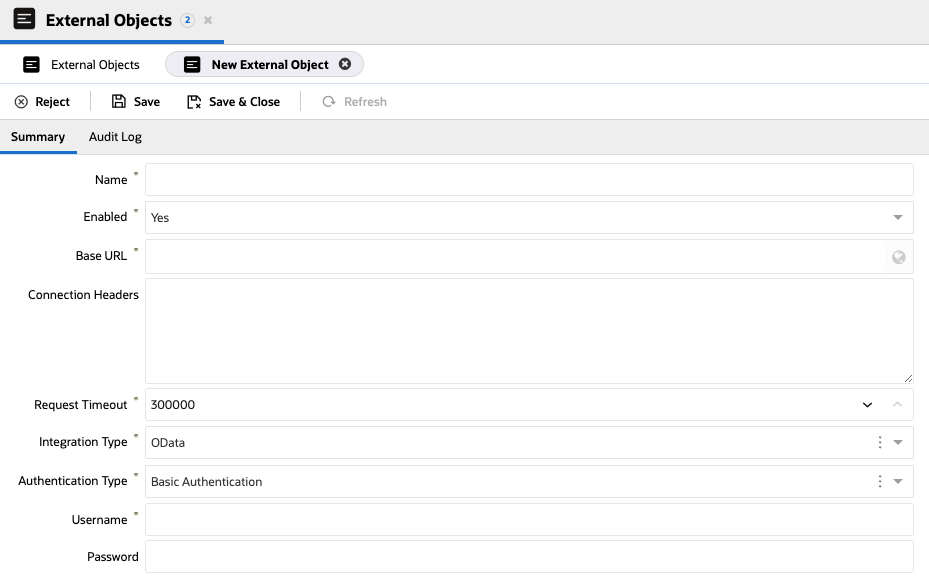
Once XO is added to navigation set, click on the Add New button to configure new connection
 Fill up all the required columns and click save, you could check this documentation for more details.
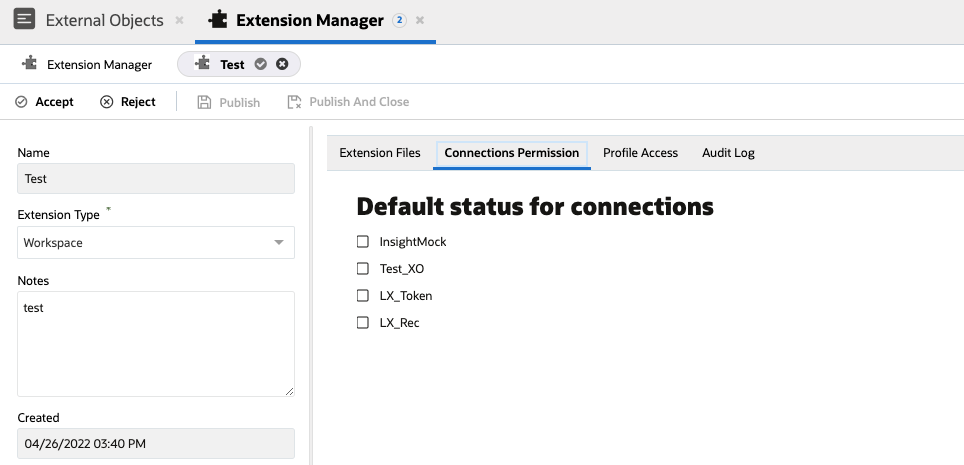
 Once you have setup the XO configurations, open the required BUI Extension with extension manager and select the newly created XO under connection permission. The extension will be able to consume XO connection only if the connection permission is given.
 Once you have updated the above configurations, kindly logout and log in again.
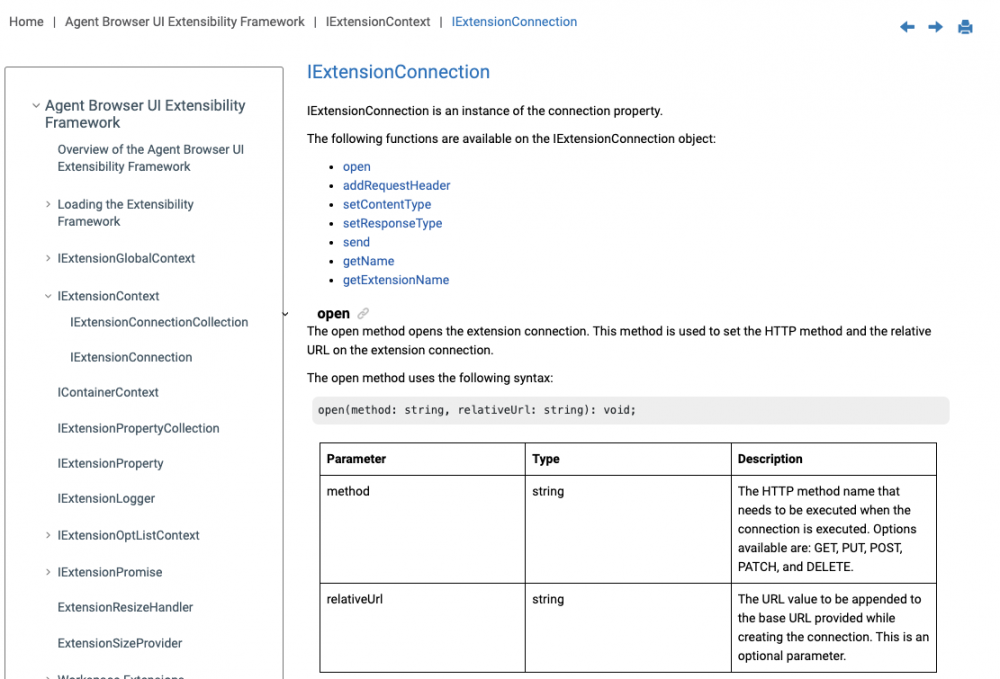
You will be able to find how to consume XO through BUI Extensions from the Extensibility documentation.
 Pros
Pros
XO will work as a proxy between BUI Extension and the API
Supports REST and OData integrations
Supports different authentication types
You could configure one xo connection and can be shared with different extensions
Cons
Cannot be used if the request data has to build dynamically for example: If the request token is built from multiple parameters from a json object.
XO will work only for standard ports (80, 443). If the endpoint is build with a custom port number then XO will not be able to connect.
Using PHP Custom Scripts
Create a PHP layer which does the authentication and handles sensitive data. The BUI Extensions should always communicate with PHP script to get active auth tokens or fetch some data from external service. The request from BUI extensions can be validated using agentAuthenticator in the Connect PHP. The agentAuthenticator API accepts a session token as the parameter and throws error in failure scenarios.
 Creating Custom Script API
Create a new php file with the authenticateSessionID included. You could follow connect PHP documentation for including the agent authenticator.
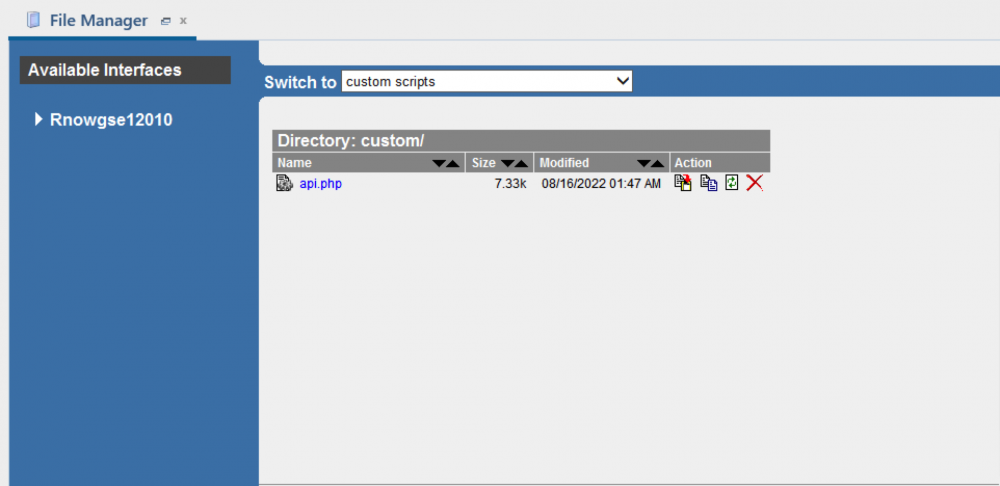
 Upload the created php file to custom scripts directory
 Once you have uploaded the PHP script, you will be able to access this file by referring the below syntax
<interface URL>/php/custom/<filename>.php
eg: http://my_site.custhelp.com/cgi-bin/my_interface.cfg/php/custom/api.php
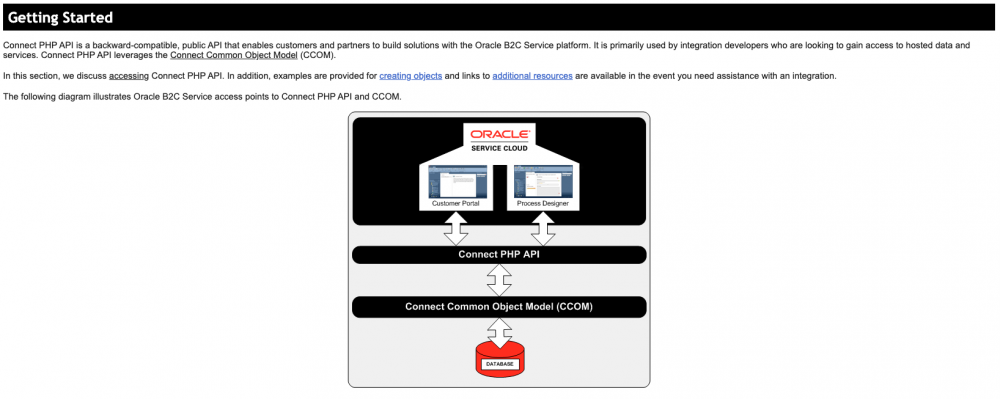
The connect PHP documentation have detailed steps for accessing different types of objects available in B2C Service.
 The custom script endpoint can be accessed from BUI console using AJAX, by passing session token as request body, the token is further fetched on PHP script for validating.
Handling Credentials with Custom Script Endpoint
Once you have created a custom script endpoint, which responds to a valid user agent session, you could proceed with creating configuration entries.
The configuration entries can hold any data which are required to make external calls, entries like :
Request URL's
Custom request headers
Authentication tokens / credentials
Token expiry's
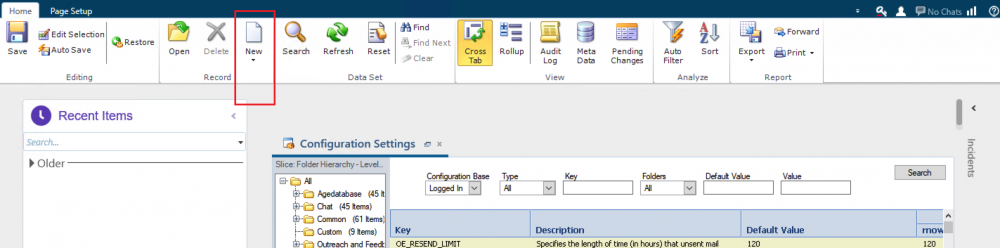
To create a configuration entry, open Configuration settings under navigation sets and double click on Configuration Settings (more details here). If you are unable to see configuration settings, please check this answer link.
 Search for available configurations and click on New button on top
 Give a custom key name and fill out all the required columns. Configuration entry values can be made interface specific.
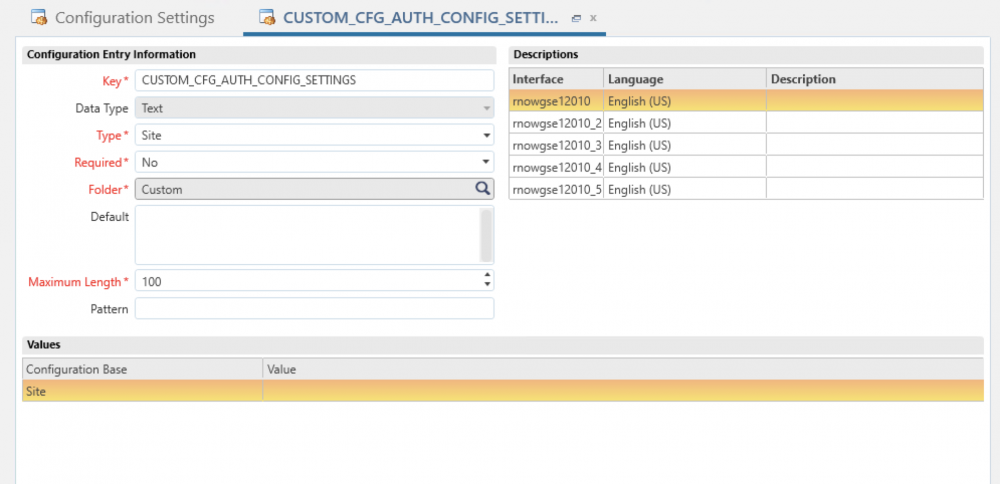 Click Save , for more details on creating custom configuration settings, please refer this answer link.
Accessing Custom Configuration settings in PHP script
For accessing the created configuration setting in PHP, please follow the below steps:
If you want to use the predefined values for configuration settings, kindly include the config.phph on the top of script
require_once(get_cfg_var("doc_root") . "/include/config/config.php");
For fetching configuration values, use the fetch method followed by configuration value
$configuration = RNCPHP\Configuration::fetch(CUSTOM_CFG_TEST_CFG_VALUE);
Sample code for fetching configuration settings:
try{
    // To use the predefined names for custom Configuration settings
    require_once( get_cfg_var( 'doc_root' ) . '/include/config/config.phph' );

    // Fetching by ID
    $cfg = RNCPHP\Configuration::fetch( 1000007 );

    // Fetching by ID using predefined values for configs
    $cfg2 = RNCPHP\Configuration::fetch( CUSTOM_CFG_TEST_SITE_INT_DefaultSameMinMax );

    // Fetching by Name
    $cfg3 = RNCPHP\Configuration::fetch( "CUSTOM_CFG_TEST_SITE_INT_DefaultSameMinMax" );

    echo "My ID:       {$cfg->ID}, {$cfg2->ID}, and {$cfg3->ID}\n";
    echo "My Value:    {$cfg->Value}, {$cfg2->Value}, and {$cfg3->Value}\n";
    echo "My DataType: {$cfg->DataType->LookupName}, {$cfg2->DataType->LookupName}, and {$cfg3->DataType->LookupName}\n";
}

catch (Exception $err ){
    echo $err->getMessage();
}
The fetched values can be used for communicating with external services.
Things to remember while working with custom script
It is recommended to use POST method to communicate with custom script endpoint, so that request body will not be readable from URL.
Refer to the best practices documentation : https://cx.rightnow.com/app/answers/detail/a_id/9640
The custom PHP will not accept custom headers. So, always pass the header values in request body
Always implement try..catch statements within functions so that all errors are handled properly
Always follow the stateless design pattern.
Check all the possible failure scenarios before coupling with BUI Extensions, you could use API testing clients like Postman to work with custom scripts.
Not recommended to hardcode URL's, Usernames, Passwords or any sensitive information within PHP code. These items can be placed in Configuration Settings and fetched through Connect PHP API.
Pros
Will get more control over data.
The response data from external API can be parsed and filter-out unnecessary informations before passing the same to client side
Using connect PHP we could perform CRUD operations into the DB directly
Can create dynamic request body from DB and other services before communicating with external endpoint
Cons
Requires more coding compared to using XO for communicating with External API
The code needs to be handled separately since the script is uploaded to File Manager instead of Extension manager
When to choose between XO & Custom Script
XO
Always think of implementing the solution with XO before going for any other customisation
Configure in XO if the external endpoint uses any of the XO supported authentication mechanisms
Custom Scripts
If you require more control over the type of data passed, like if you want to include a custom string along with request body
The external endpoint is configured on a non-standard port number
If the request data is build from B2C Service DB by running multiple queries
Handling Sensitive Credentials in Customer Portal
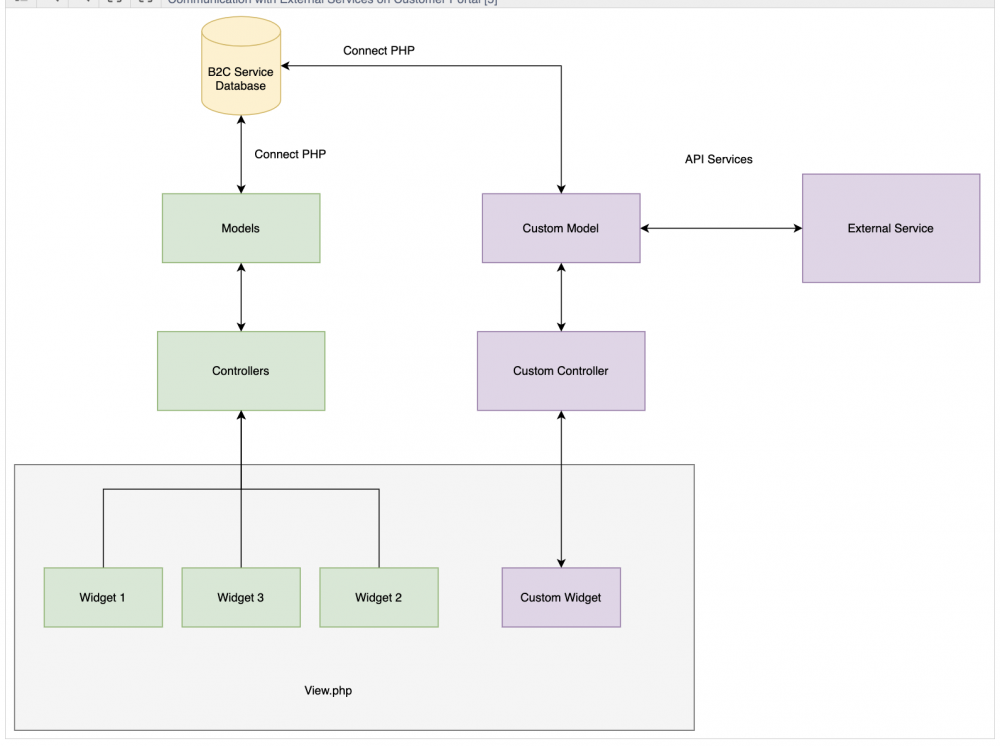
The above diagram shows the design of a customer portal page. When a URL is rendered on browser, a respective controller will be triggered and using the model, data from the database is fetched. The fetched data is further presented on view using different widgets. The end result will be HTML pages coupled with widget JS to handle asynchronous network calls. Kindly refer the Overview of Customer Portal documentation page for more details.
External Integrations in Customer Portal
We have the ability to implement external integrations by extending standard controllers, models and widgets. Please go through the below items :
Always use custom model for communicating with external services.
Kindly make the widget view.php with HTML contents only.
If you want to load some data asynchronously using JS, then write the code in logic.js file of the widget and should not write any JS code in view.php file
The communication flow should be widget JS → Widget Controller / Custom Controller → Custom Model → External Integration / B2C Service DB
From the custom model you could fetch value from B2C Service DB with Connect PHP or use cURL for external Integrations
The standard pages (list.php / home.php / answer-detail.php etc) or the custom pages should not use any JS directly to communicate with database
Since you have the connect PHP ability to communicate to DB, you should never use B2C Service REST API until it is really necessary (requirements like Fetching File Attachments)
Sensitive data like Passwords / Usernames / Tokens should be placed in configuration settings instead of hardcoding
The data in configuration settings could be fetched inside the custom model and used.